Activate additional languages in Dataverse
This post is part of the Dataverse series.
Dataverse languages
When seeting up your environment in the Power Platform Admin Center, one of the first decisions that must be taken is the Base language. This base language cannot be changed afterwards without a reset of the environment.
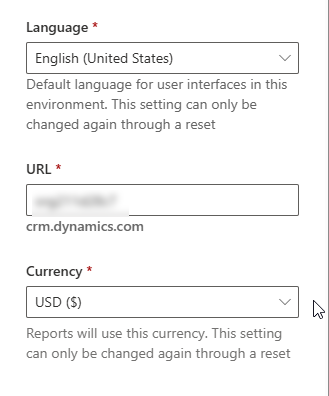 The base language is the fallback language for all tables, columns and other items in Dataverse, where another language is missing.
As Dynamics is developed in English by Microsoft and most learn articles or community tutorials are created in English as well, I strongly recommend to always use English as base language and activate any other language afterwards as translation.
In addition, all changes in the Backend, e.g. creation of new tables and columns, etc. can only be done in the base language.
Activate additional languages
To activate an additional language, open the Power Platform Admin Center - Your Environment - Settings - Product - Languages
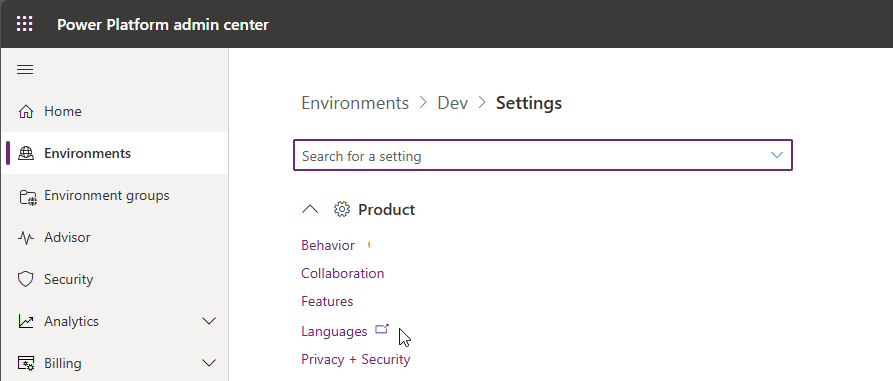 or use the Advanced Settings - System - Administration - Languages.
Both will show you the classic selection for additonal languages. There’s a list of 44 additional languages where you can select the one(s) that you need. Be aware to select wisely and only the ones that you really need, as each language will enhance the size of your solution and import and export of solutions will take more time.
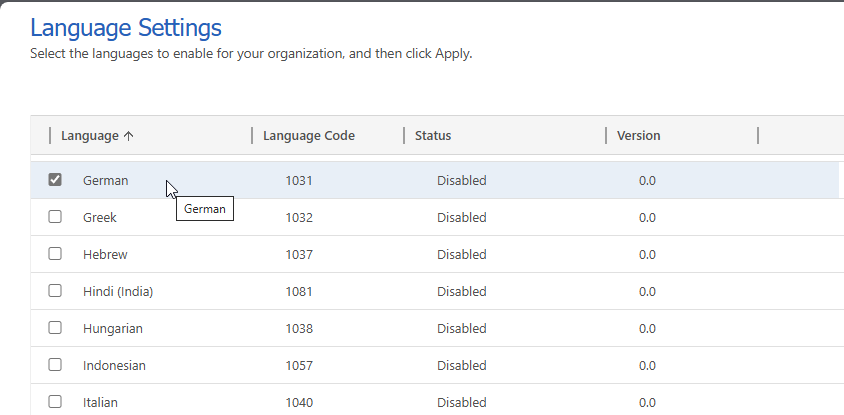 In addition, it is not foreseen by Microsoft to create custom languages - and in comparisopn to e.g. Dynamics 365 OF there is only one language for e.g. German or English and not multiple different language packs like e.g. German (Austria) or English (Ireland).
So if you are going to use Dynamics 365 CE and Dynamics 365 OF together - be aware and sometimes less is more.
Once you have selected your additional language, click on Apply in the bootom right cornwe. As the activation of each language can take some time (up to 30 Minutes) you need to confirm this step in an additonal dialog window.
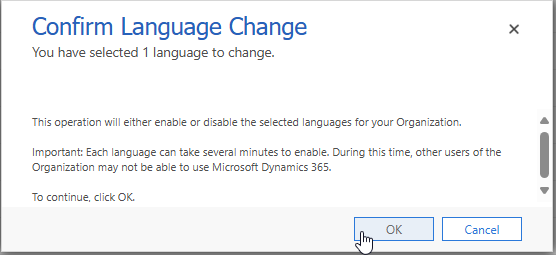
Recommendation is to activate only one language at once, to avoid any timeouts.
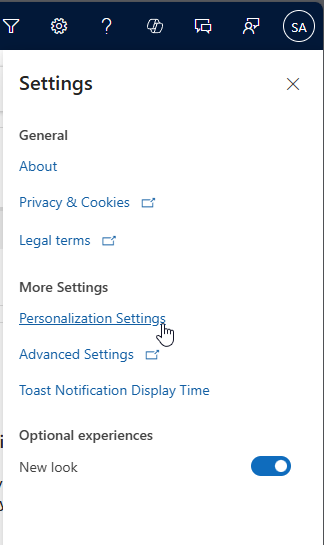
When the language pack is activated, each user can individually select the language of the Model Driven App, by clicking on the settings in the top right and then “Personalization Settings”.
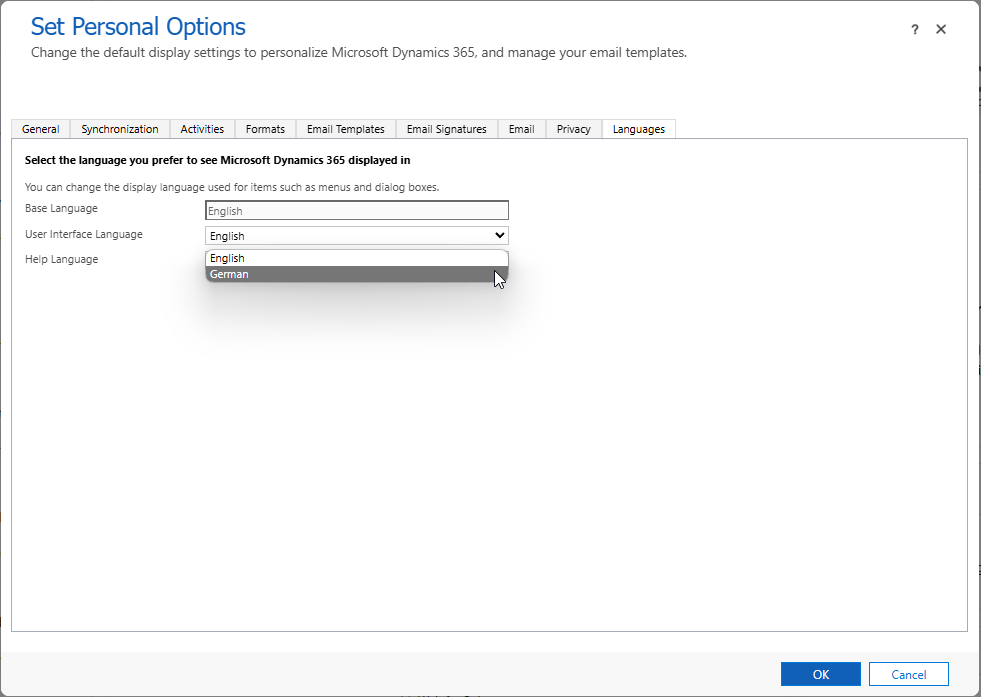
 The last tab allows to change the individual language. User Interface language and Help language can be defined separately, if necessary. As a system administrator or customizer remember to change back to the same value as the base language, before going trying to go to the classic editor or maker portal.
Out of the box translation
By default, each standard table and column is trnaslated by Microsoft. Sometimes the translation is good, sometimes not. Nevertheless, before you start creating custom translations for Out of the Box tables and columns you have to realize the impact. Especially, if you customize translations into complex languages like German, where the translation can be different by the context of the sentence, you should be aware of all the continuos work that you have to do. Especially if Microsoft is updating the translations again by themselves, or if they add new functionality. You always have to check if rework is necessary.
On the other hand, adding your own tranlsation for custom tables and columns should be a must. You are responsible for these attributes and instead of mixing up languages during the customizations by adding new attributes e.g. directly in the target language, as you do not need English - please don’t do that. You have one base language and all attributes are created in this base language. And afterwards translate these customizations if necessary.
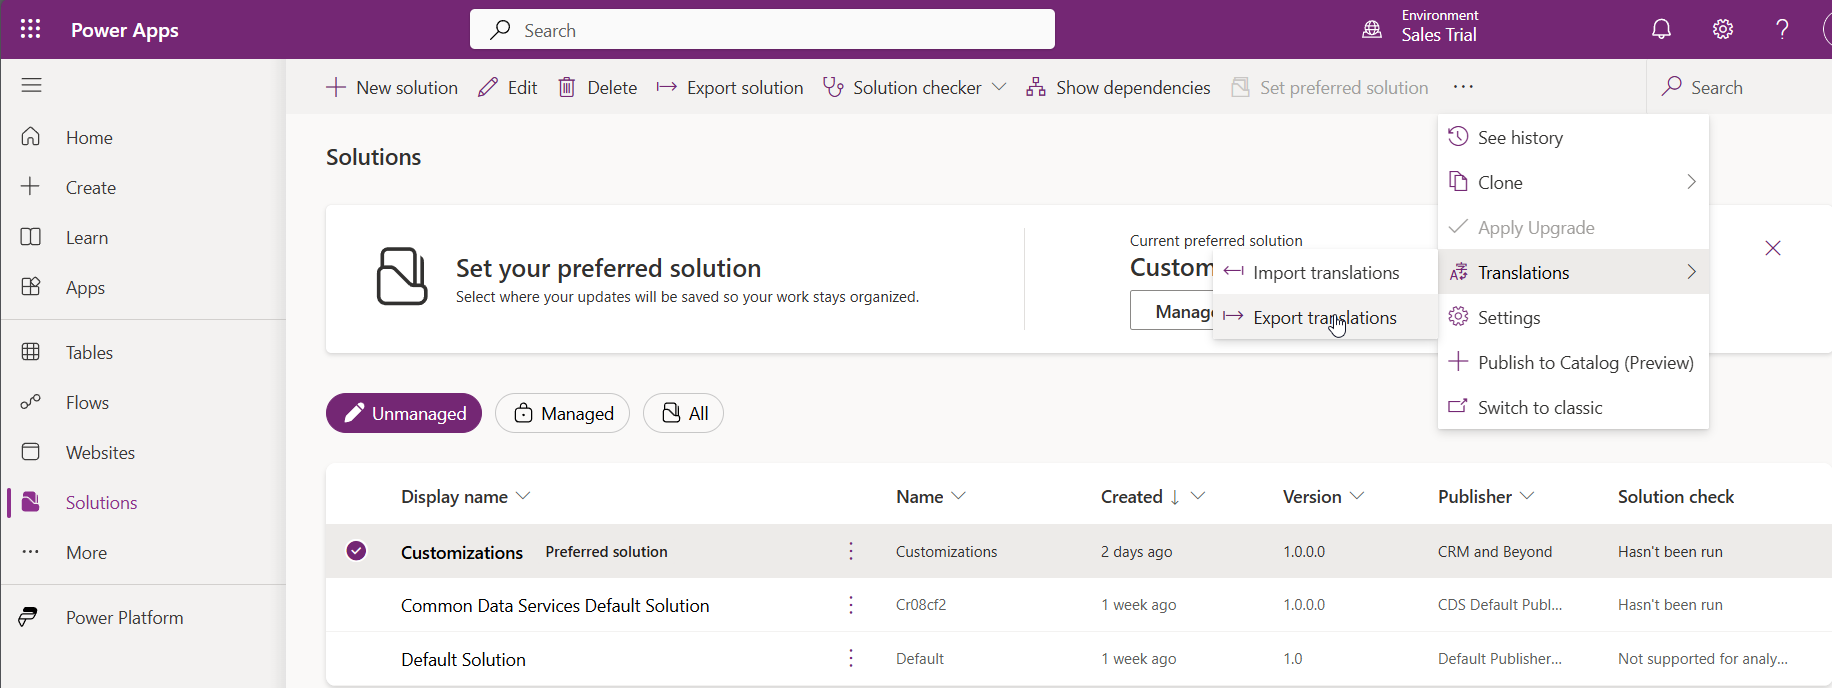
- Go to the Maker Portal
- Solutions - Just select your solution
- In the menu –> Translations –> Export Translations (if this is not visible, click on the 3 dots)
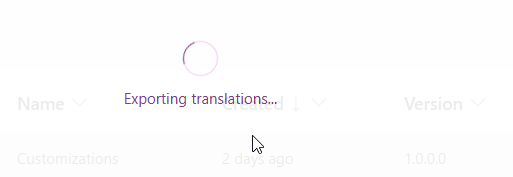
- When the export is finished, a zip file for your translations will be automatically downloaded
- Extract the content of the zip file. You will find 2 xml files that contain the translation. Update the necessary translations, zip the folder and select Import translations in the Maker portal.
I have to admit, that the xml files are not the best ways for trasnaltion, but this is still the Microsoft standard way.
Update
If you are looking for better solutions how to work with translations - have a look at:
All parts of this series (22)
- 1. Form Fill Assistance on Columns in Dataverse
- 2. Copilot for Dataverse - New experience
- 4. Copy an existing Model Driven App
- 5. Editing Command Bar in Model Driven Appswith Power FX 2
- 6. Custom Pages in Model Driven Apps
- 7. Editing Command Bar in Model Driven Appswith Power FX
- 8. Dataverse Teams Integration - External Content
- 9. Dataverse Email Integration
- 10. Manage Polymorphic Lookups in Dataverse with XRM Toolbox
- 12. Mapping columns in related Many-to-Many tables
- 13. Mapping Lookup Columns
- 15. Best Practices when working with Dataverse
- 16. Create your own M365 Dev Tenant
- 18. Activate additional languages in Dataverse
- 19. Publishers and Solutions
- 20. Tables and Columns
- 21. Datamodelling in Dataverse
- 22. Introduction to Dataverse
About CRM and Beyond
Jörgen Schladot

Solution Architect
Dynamics 365 CE & Power Platform
@ Avanade Deutschland GmbH
Recent Posts
Tags
Archives


 azure
azure
 copilot
 dataverse
 dynamics365