Dataverse Email Integration
This post is part of the Dataverse series.
What can we expect from the Email Integration
Dataverse Common Data Model contains Contacts, Emails, Tasks and Appointments tables. Another Microsoft Application that is working as well with the same kind of information are MS Exchange and Outlook. Luckily, there is a built-in integration between Exchange and Dataverse similar to the SharePoint Integration that we had a look at earlier. Let’s invest some time and activate the Server-Side Email Integration with MS Exchange.
And by the way - it is called Email and not Exchange integration as you could also integrate Emails with any other POP3 email Servers. But in this case you would not be able to synchronize Contacts, Tasks, Appointments, etc. To provide you the full picture - I will set up Exchange Online in the same tenant in this post.
Disclaimer: Emails can contain a lot of personal information, and may have multiple people in the to and from addresses. Before you activate Email Integration in any of your environments with reaL mailboxes, make sure that you have understood the concept and that you know the limitations and who is able to read messages once tracked in the CRM. And make sure that your users have the same understanding. You do not want personal messages tracked in any Dataverse environment
Let’s integrate with Dataverse.
There are 2different ways to configure the Email integration. Both will provide you the same options, but differently structured.
- The Advanced Settings in Classic Mode
- The Power Plaform Admin Center
- Open Advanced Settings by clicking on the settings icon in the top nav menu
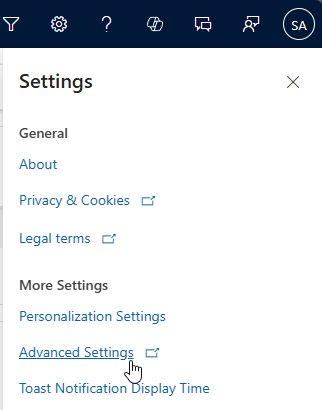
- The Classic Advanced Settings will open in a new tab. Click on the down arrow next to Settings and select Email Configuration

- If you are using Exchange Online in the same tenant, the Email profile should be prepopulated. So additonal setup steps are not necessary in this case.
 Nevertheless, if you need to configure different Email Server profiles, this would be possible here as well. But for now, lets assume, that you have Exchange online in the same tenant as your Dataverse or Dynamics.
 - Next, click on Email Configuration Settings

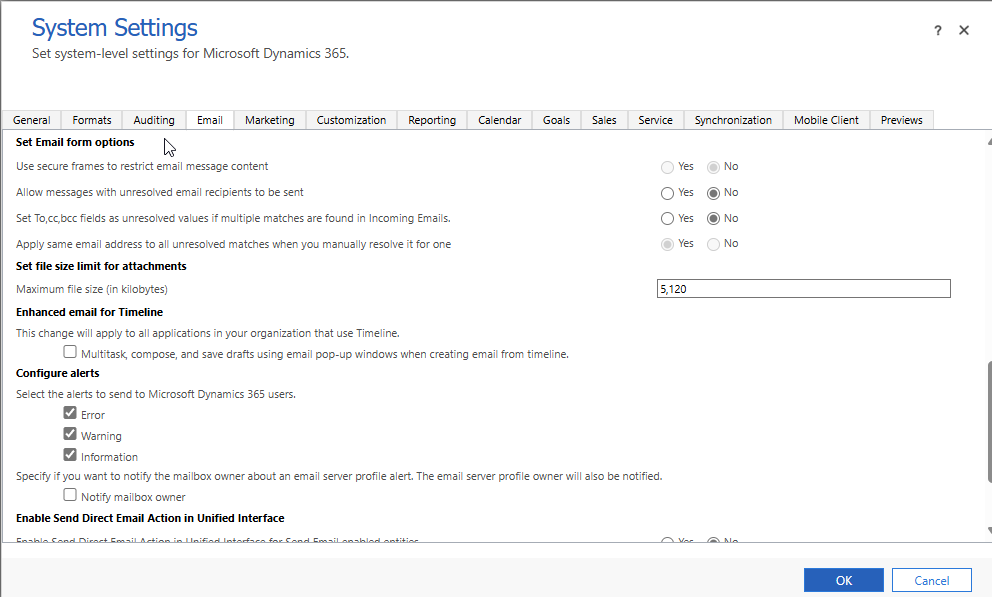
- This will open the System Settings Dialog window, directly in the Email tab.
By default, Server-Side Synchronization and the Exchange Online Profile are preselected, and Server Side Synchronization is set as default for Incoming and Outgoin Email, which is fine as well.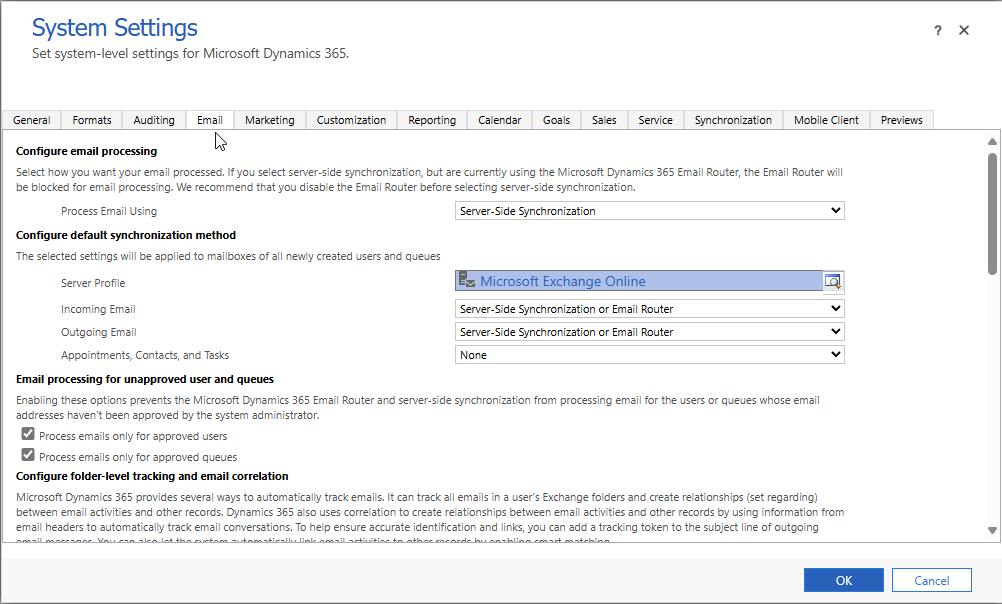
- For Appointments and Tasks, the default is set to None. If you want to experience the full synchronization between Dataverse / Dynamics 365 and Exchange, you should select Server-Side Synchronization as well. If the users have installed MS Outlook on their Desktop, this could be an option as well, but I would strongly recommend to select Server-Side synchronization as you will be dependent on the Outlook application otherwise.
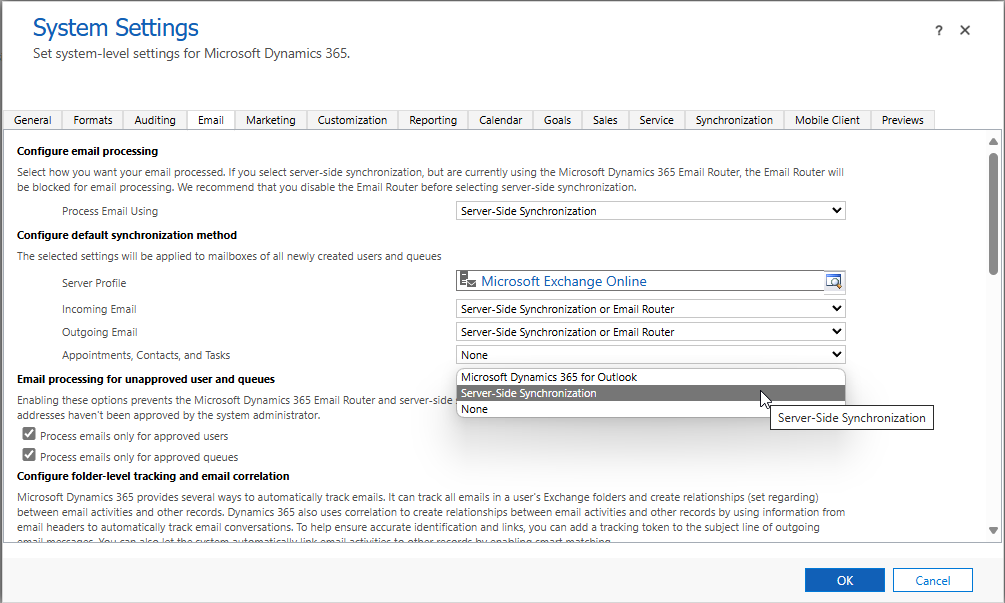 For the beginning, you can leave the other options set to the default, but make sure, that you come back and have a look at all the System Settings and that you understand, what these settings will be doing. Most of the settings are working fine by default. Sometimes you have to come back and at least have a look at the size limit for attachments
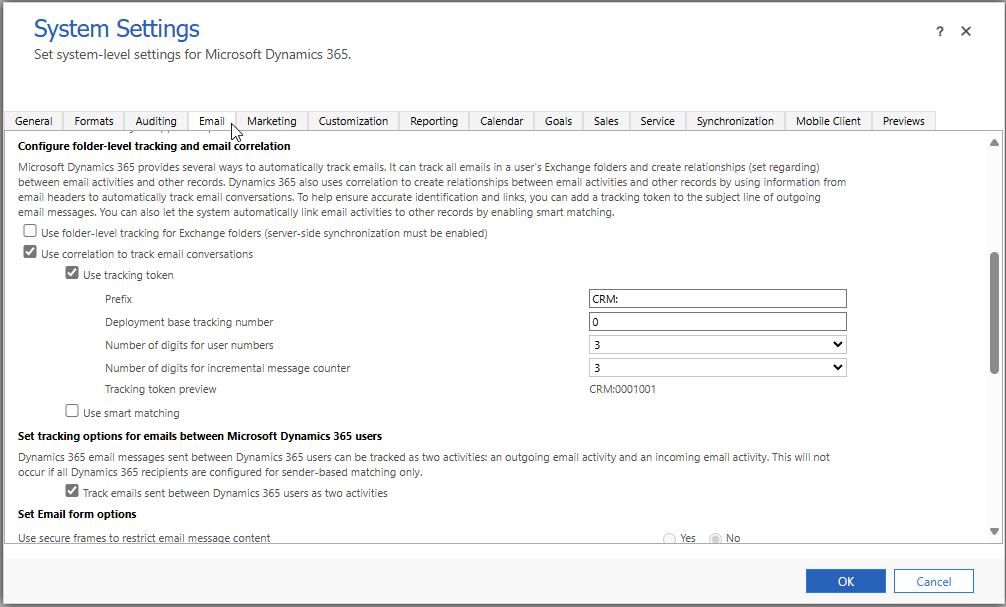
- Switch now to the Synchronization tab in the System Settings window.
Make sure to activate the checkboxes for Appointment and Tasks as well, before clicking on OK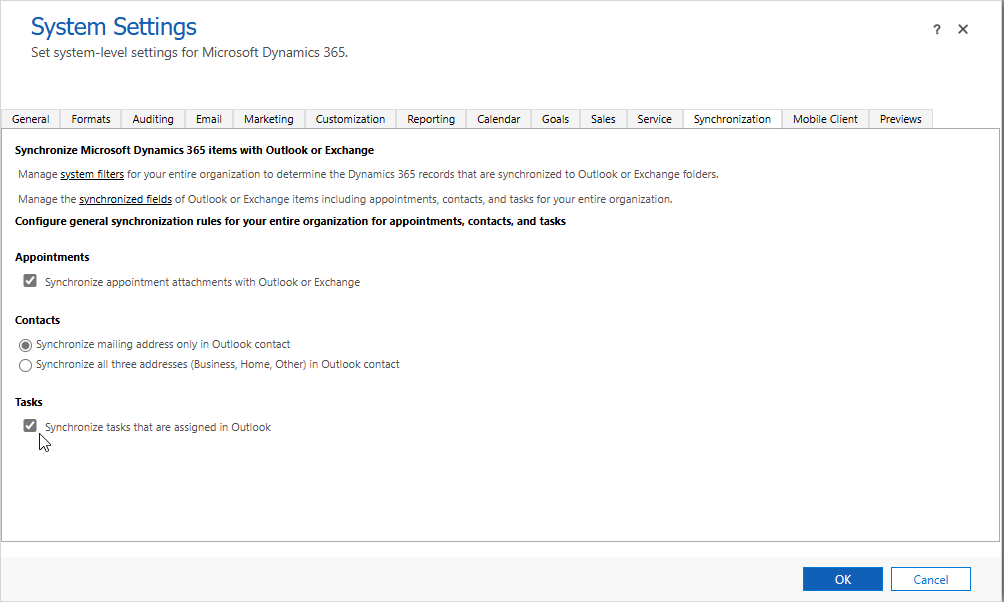
- Now, back in the Email Configuration, click on Mailboxes
- Select the Mailbox(es) that you want to activate. Click on Test & Enable Mailboxes and Confirm the Pop-up Window.

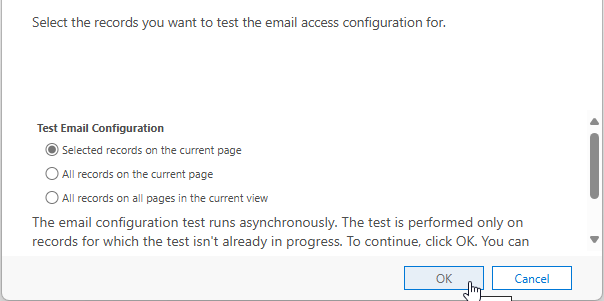 This will take a moment to run. If you refresh the view, you will see In Progress status and if everything is correct Success
 - If appointments is Not Run, double click on the Mailbox and change Appointments from None to Server-Side Synchronization

 Confirm with Save & Close and rerun Test & Enable
 To Avoid the last step, you could also click on Apply default Settings before you click on Test & Enable
 - Now, everything should be configured correctly and you can test the integration by e.g. opening outlook online.
All parts of this series (22)
- 1. Form Fill Assistance on Columns in Dataverse
- 2. Copilot for Dataverse - New experience
- 4. Copy an existing Model Driven App
- 5. Editing Command Bar in Model Driven Appswith Power FX 2
- 6. Custom Pages in Model Driven Apps
- 7. Editing Command Bar in Model Driven Appswith Power FX
- 8. Dataverse Teams Integration - External Content
- 9. Dataverse Email Integration
- 10. Manage Polymorphic Lookups in Dataverse with XRM Toolbox
- 12. Mapping columns in related Many-to-Many tables
- 13. Mapping Lookup Columns
- 15. Best Practices when working with Dataverse
- 16. Create your own M365 Dev Tenant
- 18. Activate additional languages in Dataverse
- 19. Publishers and Solutions
- 20. Tables and Columns
- 21. Datamodelling in Dataverse
- 22. Introduction to Dataverse
About CRM and Beyond
Jörgen Schladot

Solution Architect
Dynamics 365 CE & Power Platform
@ Avanade Deutschland GmbH
Recent Posts
Tags
Archives


 azure
azure
 copilot
 dataverse
 dynamics365