Mapping columns in related Many-to-Many tables
This post is part of the Dataverse series.
In my previous article about Mapping I have shown how to create a mapping in general, for “normal” fields like string, number, choice or also Lookuls. You can have a look at this post, if you need to get a basic understanding about mapping and where to create it.
In addition, there is a specific type of relationship, where mapping is not possible. Therefore, today we are talking about taking over information from source to target, that are related to both entities with a Many-to-Many relationship, and the values which are selected on the source entity should also be selected on the new record in the target entity.
An example could be, that as a lead specific options can be selected, which are still relevant to the later account and therefore the information should not get lost in qualification process.
To relate values from a subgrid, you cannot follow the description in the above mentioned article. Instead, we have to choose a completely different approach, which thanks to automated cloud flows can be achieved very easily.
Let’s switch to the maker portal and add a new automated cloud flow to the solution.

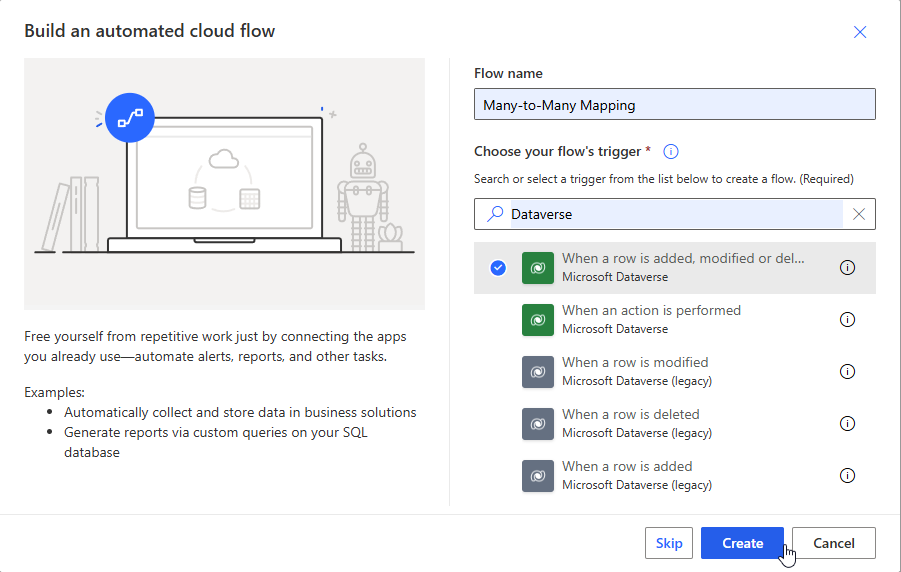
Give the flow a telling name, and select When a row is added,… Microsoft Dataverse as trigger. Confirm by clicking create
Let’s start wuith the trigger:
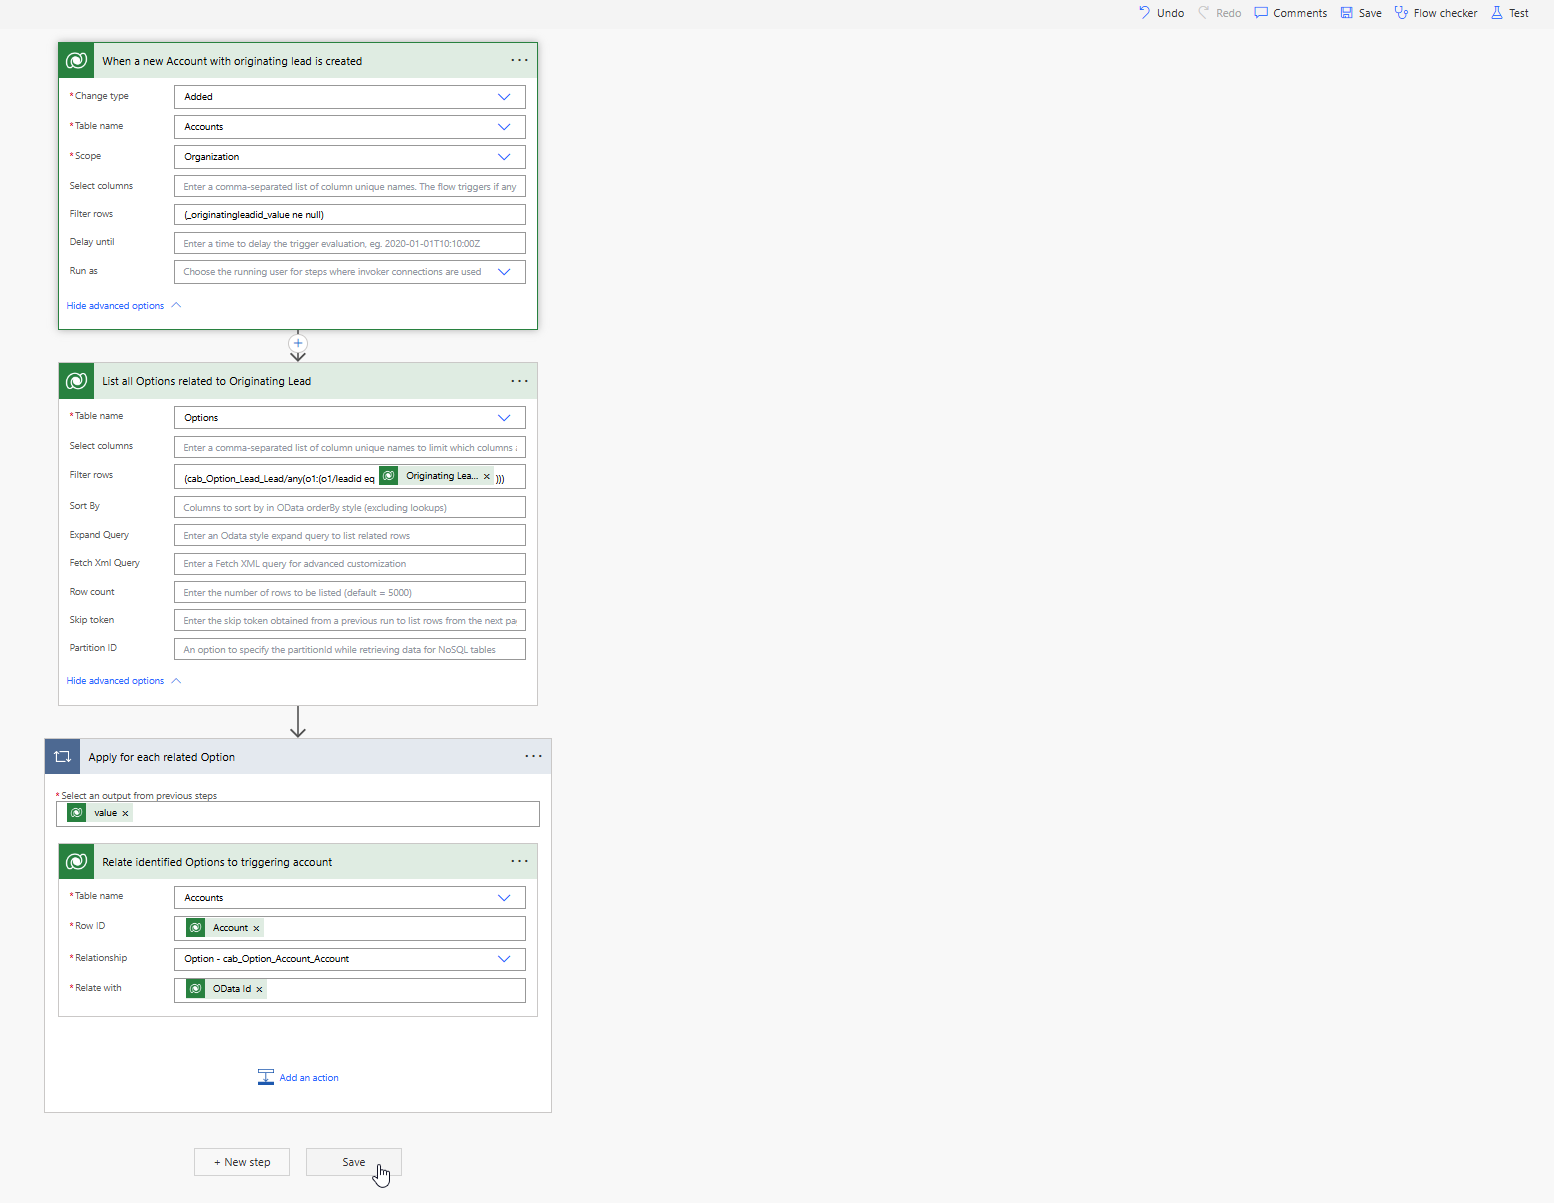
- Select Account table and scope Organization. If the flow should only run in specific context of User or Business Unit you can specify this as well.
- To limit the number of flow runs, let’s specify the conditions. The original Mapping will only run during creation of the record. As we are qualifying the lead, the lead record is afterwards read only and there will be no additional changes afterwards. Therefore we will limit the Change type to Added
- In addition, we want to filter the runs just to these accounts, that have a lead as source. If someone is manually creating a new account, we do not have a source from which we can take over existing data. Therefore adding
(_originatingleadid_value ne null)to filter rows.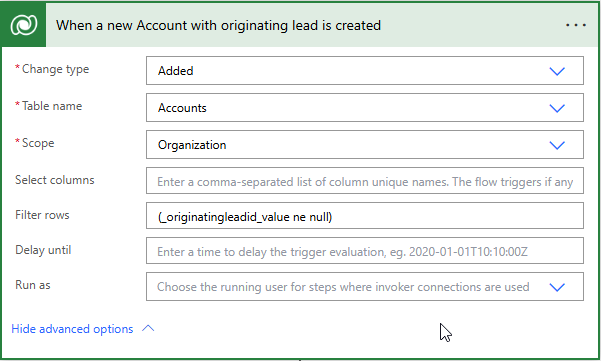 If you don’t know, how to create filter expressions for Power Automate, look at my previous post regarding FetchXMLBuilder
in XRMToolbox where I am explaining this example.
 - Before you move on to the next step - best practise is to directly rename each step. Click on the 3 dots and select rename and enter e.g., “When a new Account with originating lead is created”
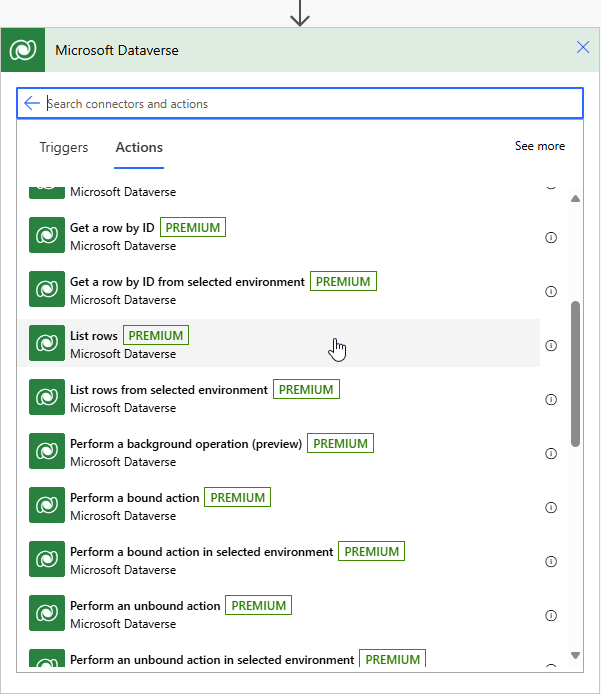
- We want to list all Option records that have been related to the Originating Lead. Therefore select “Options” as table.
- Again, you need to specify a filter, so that not all options are listed, but just the ones, that are related to the orginating lead. You have different options:
- Open the Advanced Find (Filter icon in the top navbar), which is still available, when you switch to the advanced settings in your Model Driven App. Create a filter for your scenario.

- Now you can save this as a view and reuse the view in FetchXMLBuilder as source, or you can download the FetchXML directly and use it in the flow as well.
I will continue with the view and convert the view to a filter condition in FetchXMLBuilder. The condition will look like:(cab_Option_Lead_Lead/any(o1:(o1/leadid eq @{triggerOutputs()?[‘body/_originatingleadid_value’]})))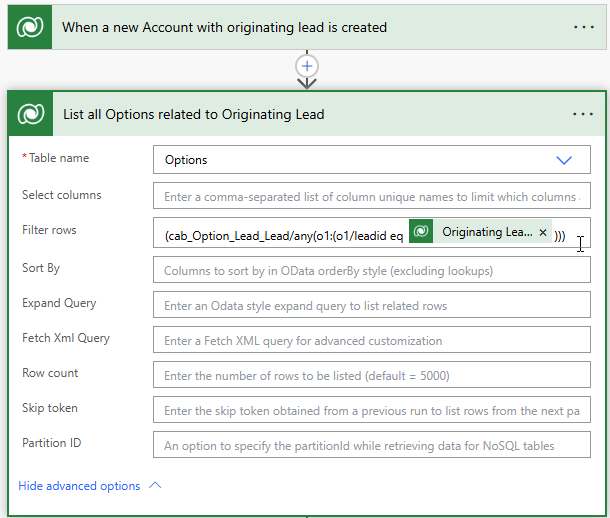
- Rename the step.
- I will add Accounts as Table name
- Row ID will be selected from the Dynamics content as Account Unique ID from the Trigger
- Based on the Account, I can select the Many-to-Many relationship to the Option. You will see the table name as well as the relationship name, which is very helpful to identify the correct one.
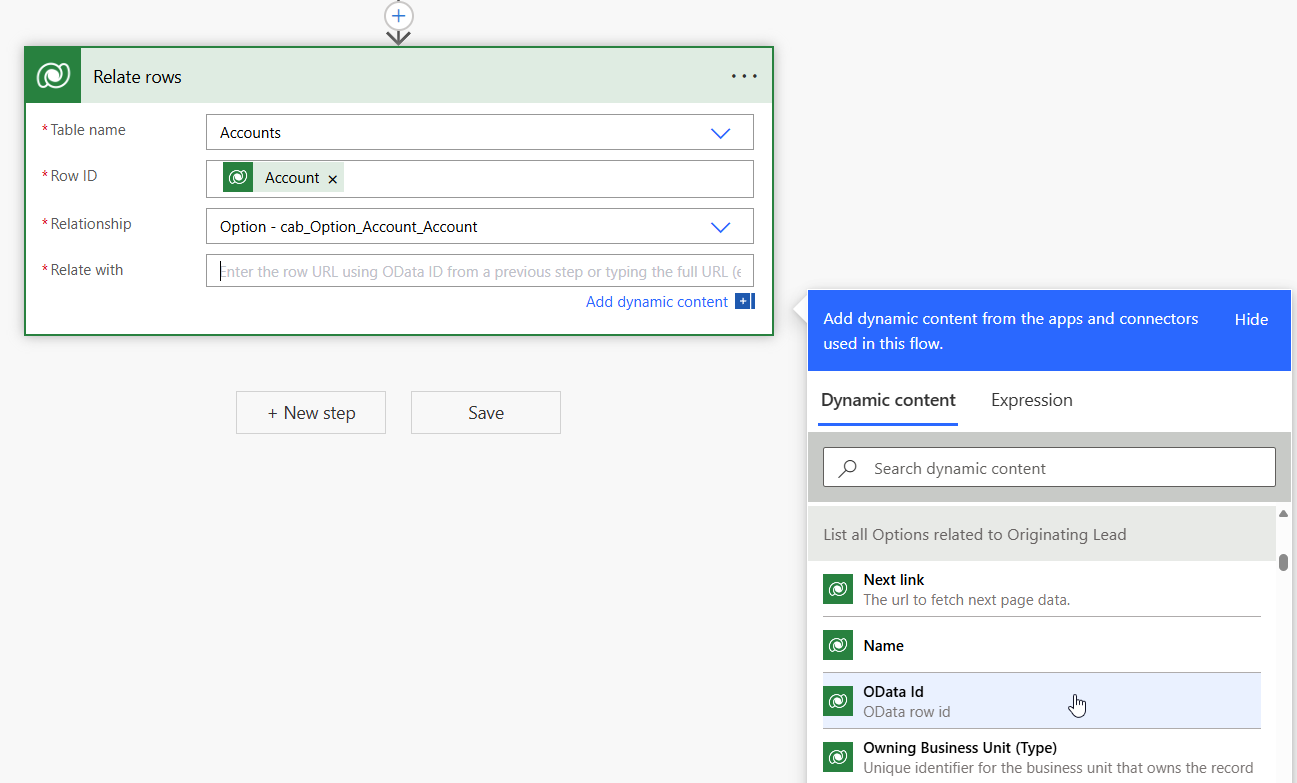
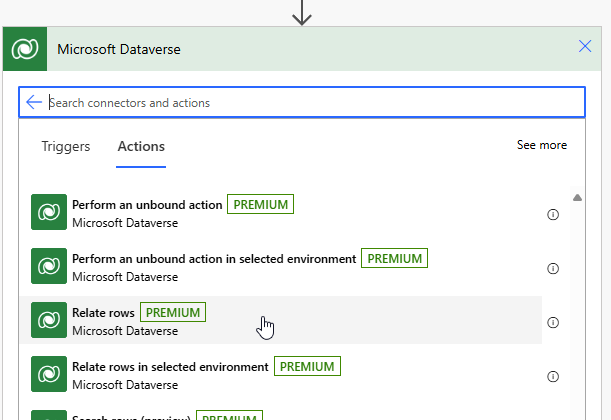
- And in Relate with I will add the Odata Id from the previous step. As soon as I will add this, the flow changes and the relate action will be added automatically to an “Apply for each” - which is exactly what we want, as each option that is related to the lead and has been identified in the previous step should be related to the account.
- Rename these steps and Save and Test you Flow.
All parts of this series (22)
- 1. Form Fill Assistance on Columns in Dataverse
- 2. Copilot for Dataverse - New experience
- 4. Copy an existing Model Driven App
- 5. Editing Command Bar in Model Driven Appswith Power FX 2
- 6. Custom Pages in Model Driven Apps
- 7. Editing Command Bar in Model Driven Appswith Power FX
- 8. Dataverse Teams Integration - External Content
- 9. Dataverse Email Integration
- 10. Manage Polymorphic Lookups in Dataverse with XRM Toolbox
- 12. Mapping columns in related Many-to-Many tables
- 13. Mapping Lookup Columns
- 15. Best Practices when working with Dataverse
- 16. Create your own M365 Dev Tenant
- 18. Activate additional languages in Dataverse
- 19. Publishers and Solutions
- 20. Tables and Columns
- 21. Datamodelling in Dataverse
- 22. Introduction to Dataverse
About CRM and Beyond
Jörgen Schladot

Solution Architect
Dynamics 365 CE & Power Platform
@ Avanade Deutschland GmbH
Recent Posts
Tags
Archives


 azure
azure
 copilot
 dataverse
 dynamics365