Editing Command Bar in Model Driven Appswith Power FX
This post is part of the Dataverse series.
Editing Command Bar in Model Driven Apps with Power FX – CRM and Beyond
Excerpt
Another XRMToolBox Plugin that I have been using for the past years very regularly is the Ribbon Workbench by Scott Durow. The Plugin or the standalone Version of the ribbon Workbench are great tools and offer lots of functionality to improve the user experience by adding buttons to the command bars in the Model Driven App – either in Dynamics 365 CE applications or in custom Power Platform Model Driven apps.
Another XRMToolBox Plugin that I have been using for the past years very regularly is the Ribbon Workbench by Scott Durow. The Plugin or the standalone Version of the ribbon Workbench are great tools and offer lots of functionality to improve the user experience by adding buttons to the command bars in the Model Driven App – either in Dynamics 365 CE applications or in custom Power Platform Model Driven apps.
Last week I stood up incredibly early to join the Vancouver User Group in which Scott Durow presented some insights of the new Commanding feature in Model Driven Apps. But what does Commanding mean and what it is offering for us related to the Ribbon Workbench?
For me – as a non-developer – it is a game changing feature that Microsoft is offering us in Model Driven Apps as part of the Power FX language. Commanding allows us, to directly create new buttons inside the Power Platform Maker Portal and adding logic to them by leveraging Power FX, the language we are using in Canvas Apps. And we can not only use Power FX, but it is also supporting IntelliSense as well and therefore adding a huge help to the feature.
Besides, working with Power FX is so much faster than working with the Ribbon Workbench before. Just apply your changes and click Save and Publish afterwards.
In my example below, I just want to set all Marketing attributes related to email activities to do not allow on the Account table. As mentioned above entering the Power FX logic is done the same way, you might be used in Canvas Apps.
Step by Step:
- Opening your solution in the new Solution Editor (the solution should contain your app already)
- Select the App and click on the … to select Edit –> Edit in preview
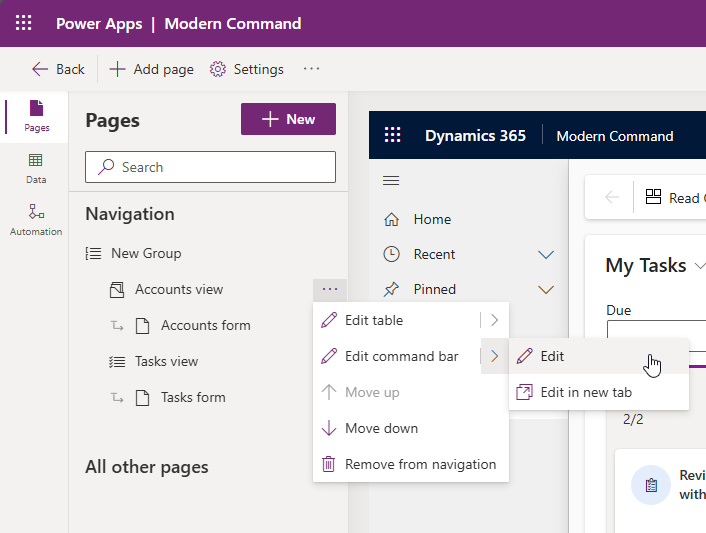
- Select the Table you want to edit, e.g., Accounts and click on the … and select Edit command bar (preview)
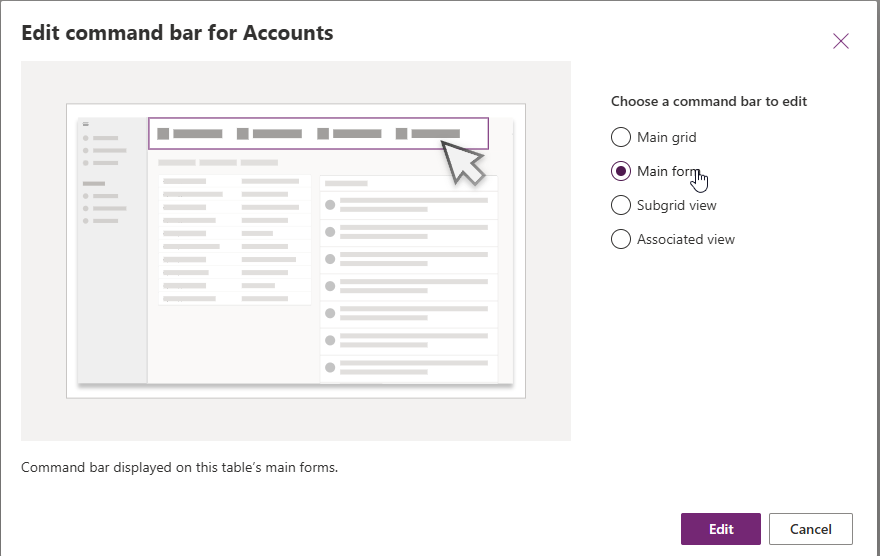
4. In the dialog select the command bar you want to edit. The dialog offers four different command bar options. As I want to add a new button to the account form, I am selecting Main form
Note: All existing buttons cannot be edited with the new option. So, if you need to work with these – please continue working with the Ribbon Workbench. If you have a new button and the use case matches the Power FX requirement, try the new feature – but remember it is still in preview.
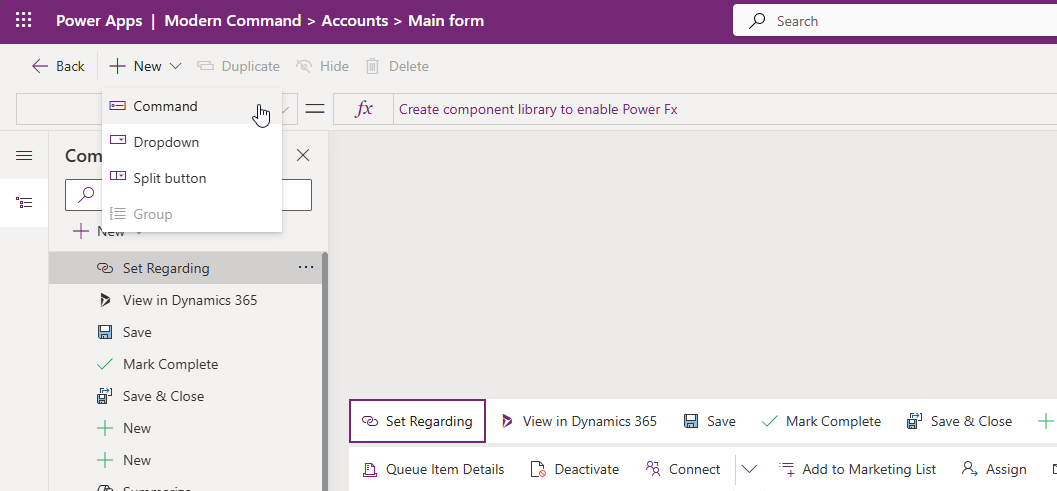
5. Click +New Command to add a new button to the command bar.
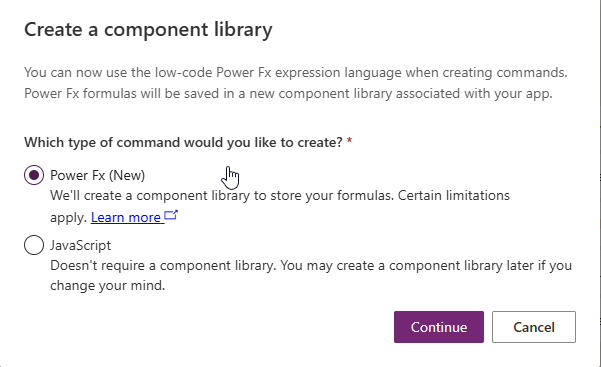
In the next Window you have to select if you want to add a Power FX or JS Button. IN this post we will use Power FX, but remember that you can use JS as well and that this is a very handy functionality to add a JS button to a Model Driven App.
Note: You can change the position of the new button by drag and drop.
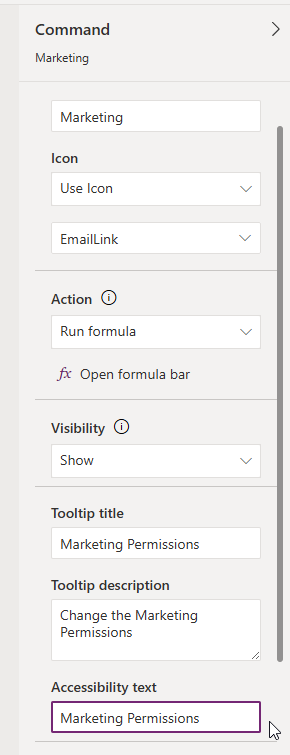
6. On the right side you have different options, e.g. naming the button by editing the label, adding an Icon either by using an existing one or by using a webressource, entering a tooltip, etc.
7. On the top as used in canvas app editor you can specify the logic
8. For my use case I am entering the following logic:
Patch(
Accounts,
Self.Selected.Item,
{‘Do not allow Bulk Emails’:‘Do not allow Bulk Emails (Accounts)’.‘Do Not Allow’},
{‘Do not allow Emails’:‘Do not allow Emails (Accounts)’.‘Do Not Allow’},
{‘Follow Email Activity’:‘Follow Email Activity (Accounts)’.‘Do Not Allow’}
);
Notify(
“Email Marketing not allowed”
);
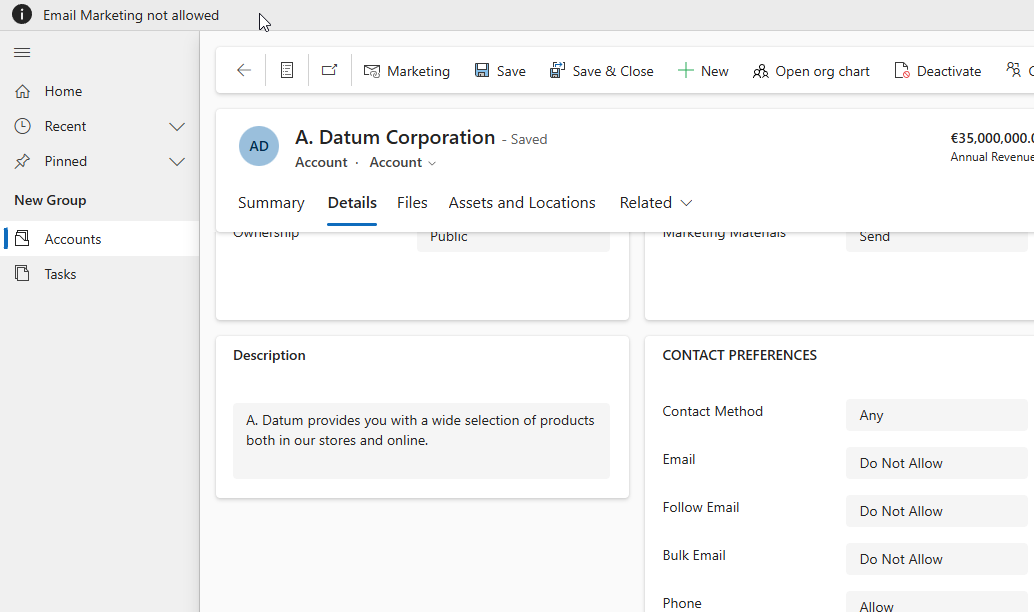
The Button in the Model Driven App
Hovering over the Button in the Command BAr in the Main form will show how the Hint Text title and Description will be displayed.

After clicking on the button, the Notification Message will appear directly below the top bar. In addition, the specified values for the columns have been updated.
Once you have successfully tested your new button, make sure, that you save and publish the Command Editor as well as the originating App, where you have embedded the new command.
In my next blog post I will advance the button a bit by adding additional functionality
All parts of this series (22)
- 1. Form Fill Assistance on Columns in Dataverse
- 2. Copilot for Dataverse - New experience
- 4. Copy an existing Model Driven App
- 5. Editing Command Bar in Model Driven Appswith Power FX 2
- 6. Custom Pages in Model Driven Apps
- 7. Editing Command Bar in Model Driven Appswith Power FX
- 8. Dataverse Teams Integration - External Content
- 9. Dataverse Email Integration
- 10. Manage Polymorphic Lookups in Dataverse with XRM Toolbox
- 12. Mapping columns in related Many-to-Many tables
- 13. Mapping Lookup Columns
- 15. Best Practices when working with Dataverse
- 16. Create your own M365 Dev Tenant
- 18. Activate additional languages in Dataverse
- 19. Publishers and Solutions
- 20. Tables and Columns
- 21. Datamodelling in Dataverse
- 22. Introduction to Dataverse
About CRM and Beyond
Jörgen Schladot

Solution Architect
Dynamics 365 CE & Power Platform
@ Avanade Deutschland GmbH
Recent Posts
Tags
Archives




 azure
azure
 copilot
 dataverse
 dynamics365