Publishers and Solutions
This post is part of the Dataverse series.
Power Platform Menu
If you want to make a change in an environment for the first time, you should not do this directly in the data model, but create a new solution in the Solutions area, in which you can save all the adjustments that you want to make in the system.
There are some simple reasons for this recommendation:
- If you create anything outside of a solution, it will use the prefix and context of the default publisher. In the maker portal it is e.g. cr00b_, in the classic editor new_.
- The artificats that you have created are outside of a solution, and therefore outside of any ALM process. You cannot export something you have created, unles it is part of an unmanaged solution.
- Changing Prefix / Publisher afterwards is not possible. Even if you are adding the created artifact to a solution, the original publisher will remain, unless you delete and recreate this item. And deleting something can be a real stuggle, based on existing dependencies.
Create new solution
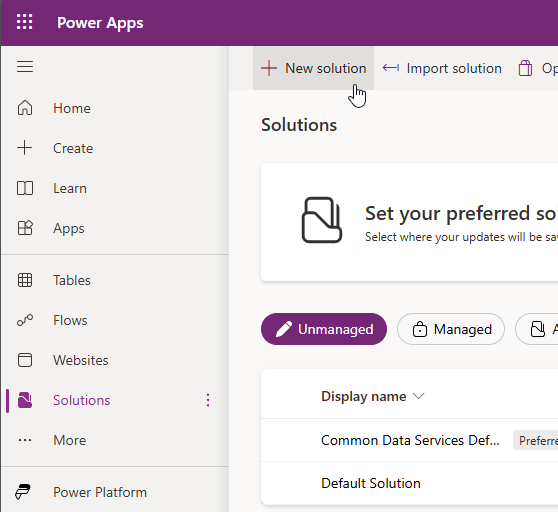
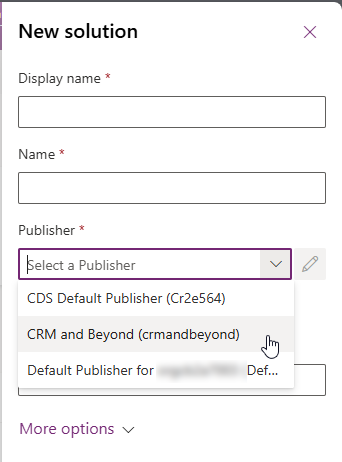
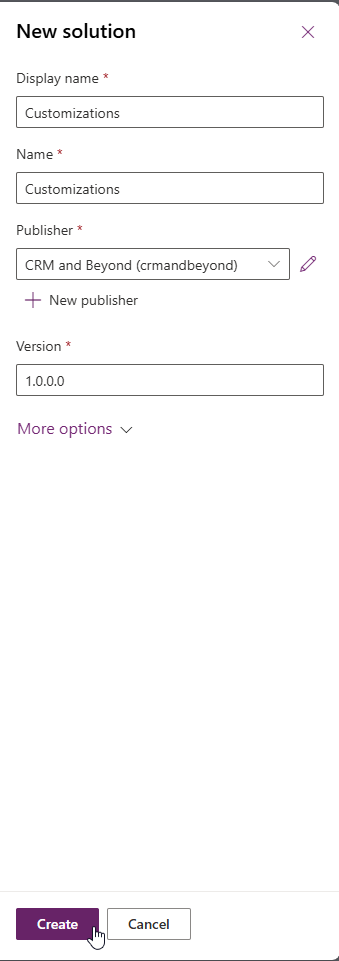
If you create a new solution using the “New solution” button, you have to select a publisher in addition to the display name and name of the solution.
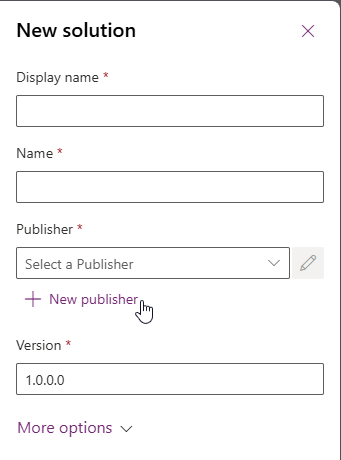 And if you have not yet created your own publisher in this environment, you should start with this point and click on “New publisher”.
Create new publisher
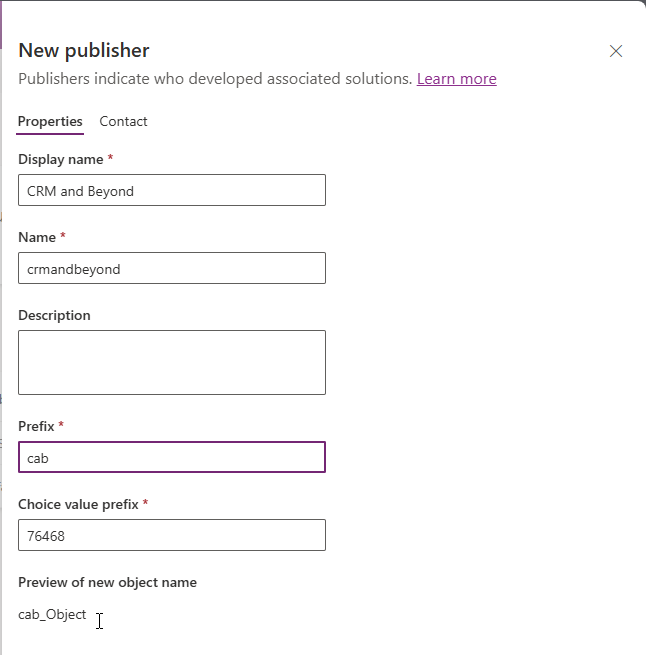
This opens another quick menu with two tabs. In the first tab you save the basic properties of the publisher. In addition to display name and name, this also includes the prefix that will be used in the future and placed at the beginning of every table, column, etc. The choice value prefix is calculated based on the prefix that you are entering, and is always placed in front when creating your own choice values.
You can also change the value and the prefix after saving the publisher, but the publisher’s name is fixed.
Make sure that you do not have spaces or special characters in the Name and if you have different sources for your development, make sure that the publisher Name is always written the same, e.g. not mixing lowercase and PascalCase.
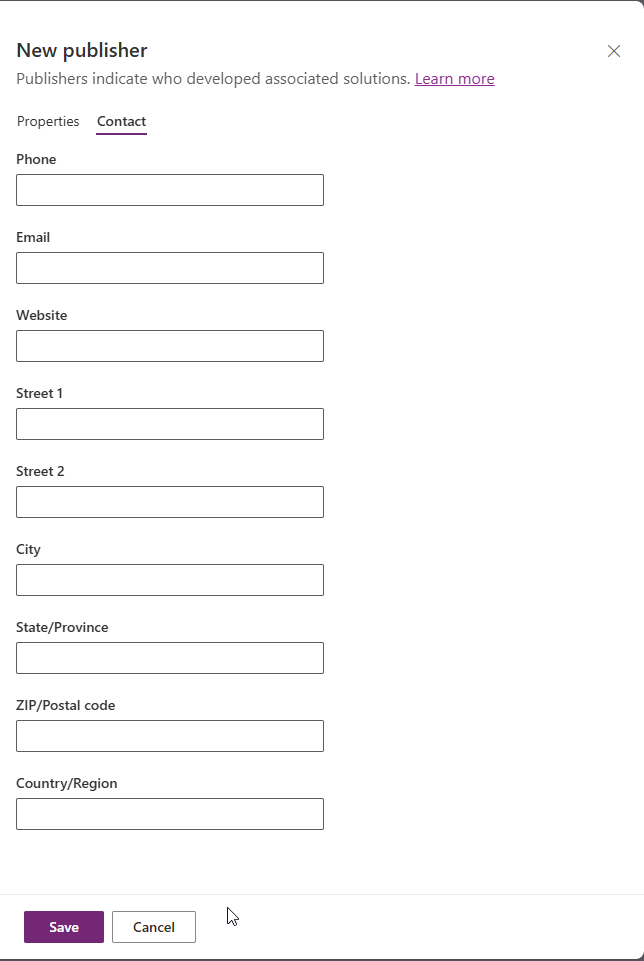
The second tab of the publisher contains all the contact details that can be filled in - but do not have to be e.g., Phone, Email, Website, Street 1 etc.
After saving the publisher, it is immediately available to be added to the solution you just want to create.
Adding solution details
Now that you have created and selected your publisher, you can add other information to the Solution, like Display name and name. Unfortunately, unlike other experiences, the Name is not autogenerated by the Display name in this case, so you have to write your name manually.
Once the solution is saved, the empty solution is preselected in the Maker portal and you can start creating new objects in contect of this solution or adding existing ones.
Update 2024: Preferred Solution
But there’s a new step now, that I am recommending first. And which will help you a lot in the future, especially when multiple people are developing at the same project and you have a common solution where you want to add all new created obejcts.
Leave the solution and go back to the solution overview - unmanaged solutions.
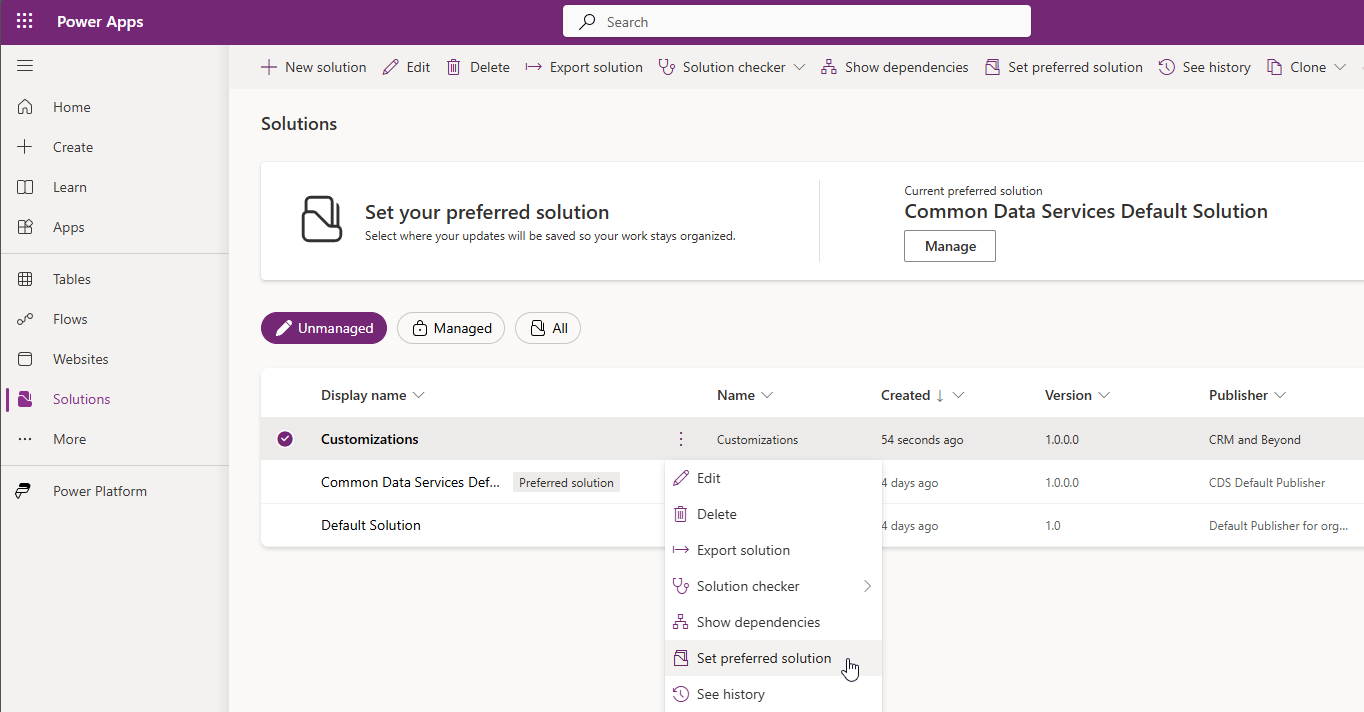
At the top, you can see the option to Set your preferred solution. Either click on Manage, or select your solution in the list of unmanged solutions and click on the 3 vertical dots to select Set preferred solution.
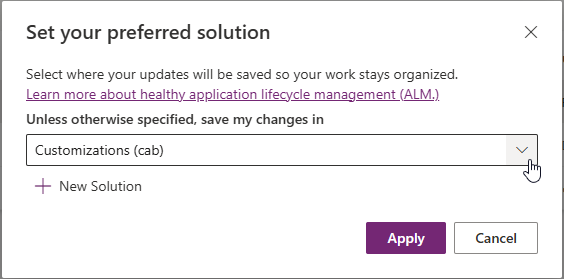
Once you have selected either of the both options, the next dialog is the same, with the difference, that if you have selected the option in context of the solution, your solution is already prepopulated. Otherwise, you can now select the solution that you want to define as Prefereed solution.
After you have applied the selection, your solution will be highlighted as preferred solution and from now on, all objects that you are creating without selecting a solution first, will be created within the context of your preferred solution. And you will be still able to select a different solution and publisher to create objects within another solution.
Maintaining and creating publishers 2
Above, we created the publisher directly within the context of creating a new solution. And I still think this is a valid way. But there is also a different Option to create and maintain publishers.
Instead of selecting the solutions in the Menu, you might have to select …More and the Discover all button.
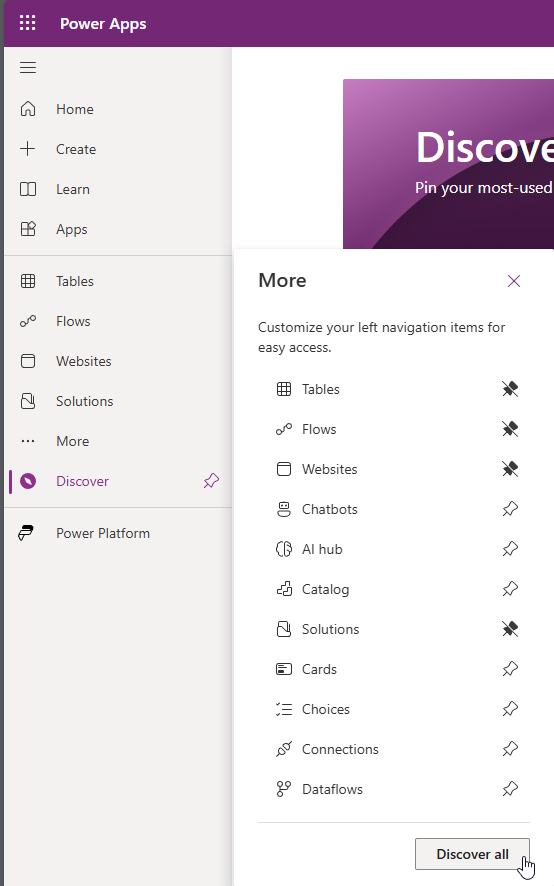
Now you will see all available options in the center screen and not just a few preselected menu items. Scroll a bit down and you will find App Management with Publishers.
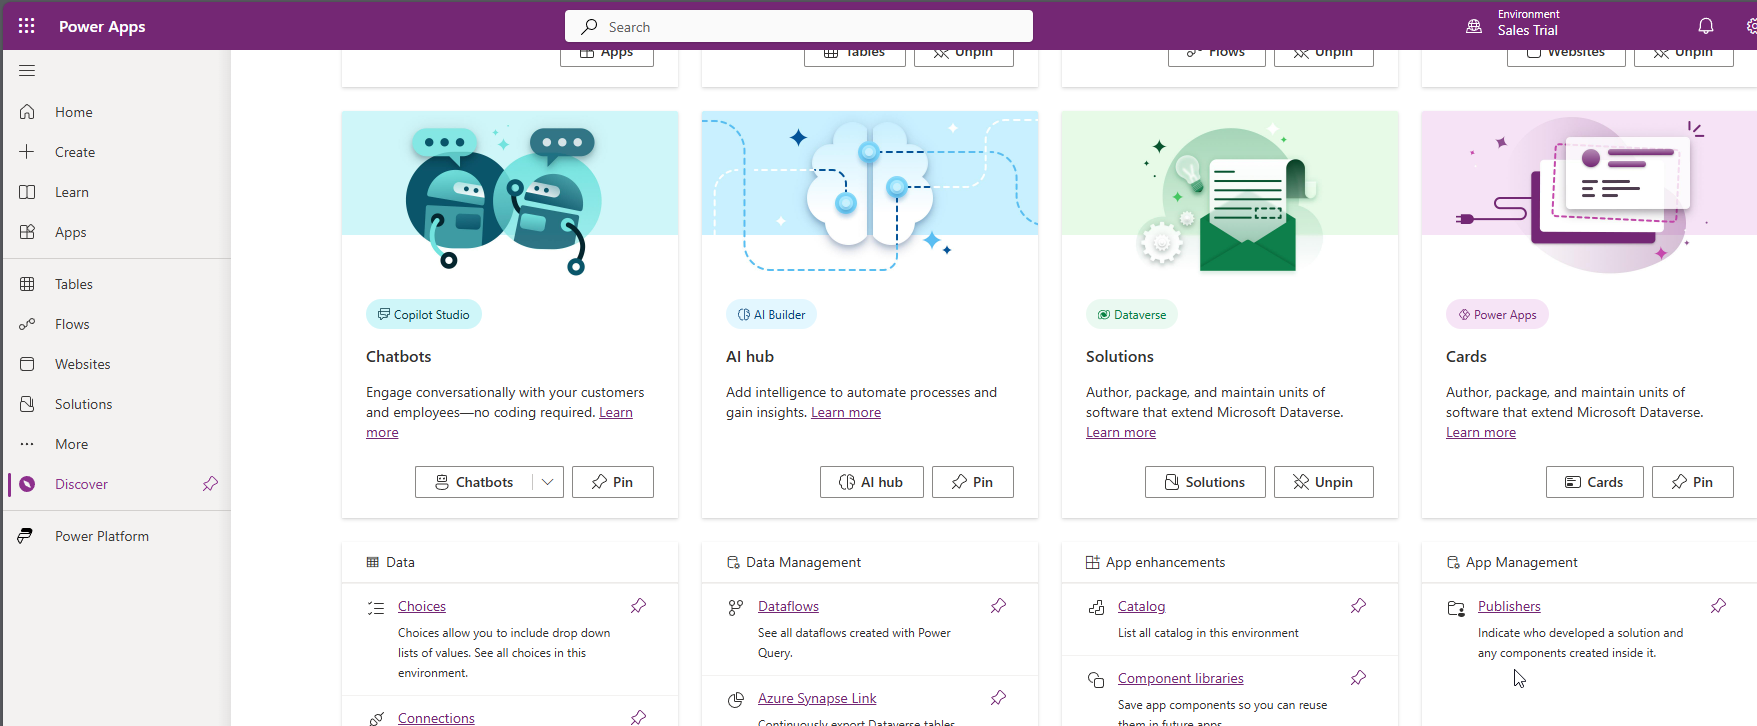 If you like, you can pin the option to your menu, to have direct access, or just click once on the link.
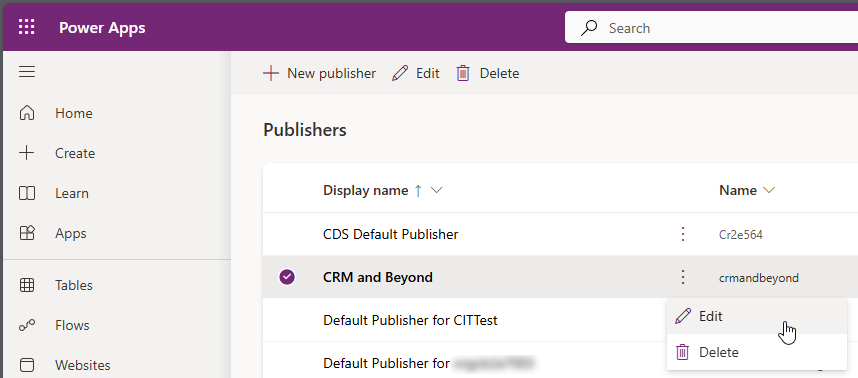
In this area you have the option to create a New Publisher, or seelect an existing one in the list and edit the options.
All parts of this series (22)
- 1. Form Fill Assistance on Columns in Dataverse
- 2. Copilot for Dataverse - New experience
- 4. Copy an existing Model Driven App
- 5. Editing Command Bar in Model Driven Appswith Power FX 2
- 6. Custom Pages in Model Driven Apps
- 7. Editing Command Bar in Model Driven Appswith Power FX
- 8. Dataverse Teams Integration - External Content
- 9. Dataverse Email Integration
- 10. Manage Polymorphic Lookups in Dataverse with XRM Toolbox
- 12. Mapping columns in related Many-to-Many tables
- 13. Mapping Lookup Columns
- 15. Best Practices when working with Dataverse
- 16. Create your own M365 Dev Tenant
- 18. Activate additional languages in Dataverse
- 19. Publishers and Solutions
- 20. Tables and Columns
- 21. Datamodelling in Dataverse
- 22. Introduction to Dataverse
About CRM and Beyond
Jörgen Schladot

Solution Architect
Dynamics 365 CE & Power Platform
@ Avanade Deutschland GmbH
Recent Posts
Tags
Archives



 azure
azure
 copilot
 dataverse
 dynamics365