pac cli Tools
This post is part of the PacCLI series.
Today we will have a look at the pac tool command. Initially I said, that the experience in vscode is the same in all operating systems, when you are using the power platform tool extension.
For this specific command, it is not true, as the tools that will be used have been developed for and therefore support only windows.
So first, let’s start again with just entering
pac tool
and see, what additional information we will receive.
There are two options, I will not use as much as other pac commands. I am talking about
pac tool adminpac tool maker
These two commands will open a new browser tab for the current seleced environment. While this is niceto have the option from within vscode to switch to the Power PLatform Admin Center or Maker Portal, problem here is, that I am often using different tenants and create different edge profiles for each tenant.
As vscode does not know which profile to select for which tenant, this command will damage my regular workflow.
Some old friends
Having a look at the other options that are privided with pac tool, I realize that these tools are “old friends” that are available for years and if you are working with Dynamics 365 CE you should (hopefully) know them already. Let’s try out how the installation process will work with pac as the “original” tools have been (and still are) available for installation from nuget.
With
pac tool list
I will get detailed information, if tools are already installed, and which version is available:
Currently none of the tools are installed on my machine, so I will install these one after another.
Configuration Migration Tool
pac tool cmt
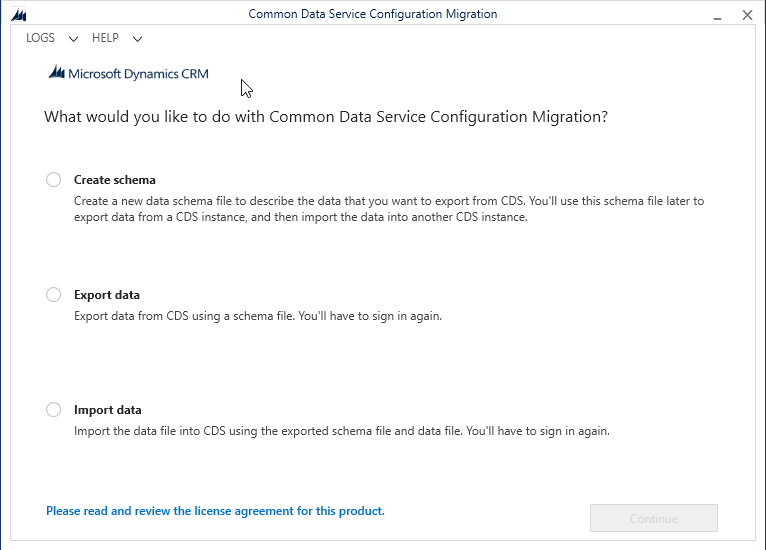
will install and directly launch the (Common Data Service) Configuration Migration Tool. ONce the windows interface opens, you can directly see, that this tool is already available for years (referencing to Dynamics CRM and CDS😁)
 The first step, when using this tool is to create a schema, unless you have been provided data and schema for import. But let’s assume, you want to micgrate data on your own from one environment to another.
- Select Create schema
- Click on Continue
- On the next screen enter your credentials - As we are not working within pac and using a standalone local tool now, you have to authenticate again
- Deployment type: Office 365
- I will not use “Sign in as current user” as I will have different users for all tenants, and these normally do not match with my windows profile.
- As most tenants have multiple environments, select the 2nd option “Display list of available orgnaizations” (organizations = dataverse environments)
- “Show advanced” will help you to log-in a bit faster, as the tool can be used globally, it tries to log-in in all regions, but you can specify by yourself, if your tenant is located in e.g., US or Europe
- Once login is completed, the list of environments is shown (incl. the Region) and you can select the source environment and click Login.
- Select the solution, where your data model is stored in. Or leave the default solution selected, where all tables are visible.

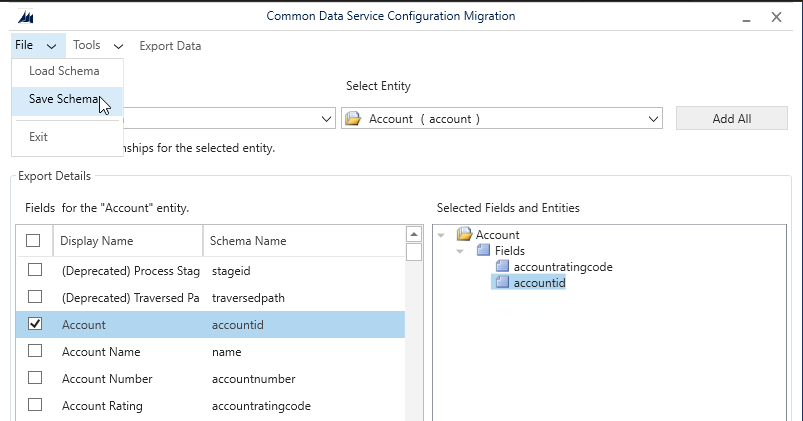
- Now the process starts, where you are selecting the tables (entities) and columns (fields) that should be part of your migration. For each table you select the specific fields and Add the fields to the “Selected fields and Entities” Area on the right
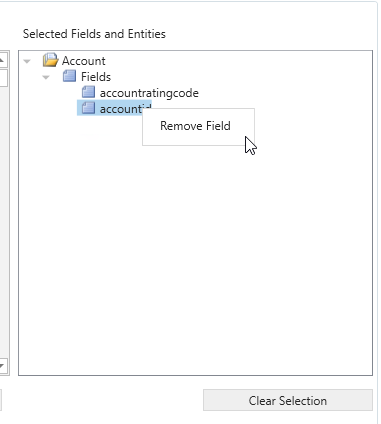
- If you have added a field that you do not need, navigate to the field in the right box, mark the field and right-click. Then you have the option to remove fields separately.

- While working on the schema, you can save or load the schema in the file menu.
If you close the tool and rerun the pac tool list command, you will now see the information that CMT is istalled.
To open it again, just enter pac tool cmt and without installation it will be directly launched again. But there’s more: With the installation using the pac tool command, there has also been created a new folder in your Windows Start menu and you can start the tool directly from there, without using pac.
Package Deployer
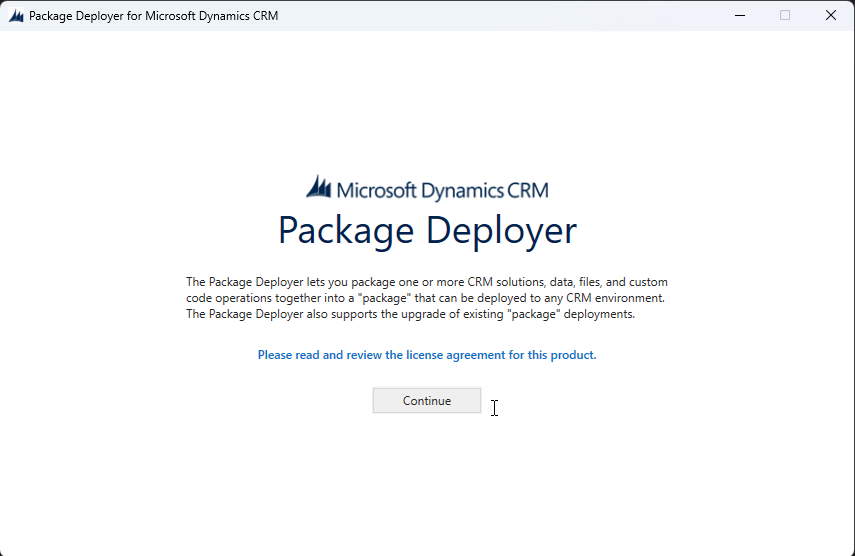
Installing and launching the Package deployer, just enter the command
pac tool pd
The windows tool opens and can only click on Continue.
Now, the package deployer closes and you will see the message that no package could be found.
Also
pac tool pd help
will only show you the option to clear or update the tool. For now, just let us install the tool and I will describe the process needed for the package deployer in one of the next posts.
Already a small hint - if you have entered pac or pac help initially then you have seen that there is also a commmand
pac package
Plug-in Registration Tool
This tool, might not be something for everyone as it is needed in case you are writing Plug-ins.
All parts of this series (8)
About CRM and Beyond
Jörgen Schladot

Solution Architect
Dynamics 365 CE & Power Platform
@ Avanade Deutschland GmbH
Recent Posts
Tags
Archives


 azure
azure
 copilot
 dataverse
 dynamics365