Custom SharePoint Integration with Dataverse
This post is part of the SharePoint series.
The custom approach
So you may have read the last posts regarding the Dataverse SharePoint Integration and these available out of the box options may not suite your process. Either you do not like the limited hierarchy options, or e.g. the automatic renaming based on the GUID is not what you are looking for.
Thanks to the Power Platform with Power Automate and lots of Connectors there is now a quite easy approach to create your custom SharePoint Integration. Nevertheless, we will still leverage the OOTB Server-Based SharePoint Integration. So if you have not done part 1 yet - this is also the starting point for the custom integration and you need to specify the SharePoint site and enable the integration.
Read more: Enable SharePoint Default Integration
Activate SharePoint Integration for tables
In the second post of this series, you have learned, that tables will be automatically activated for SharePoint Integration when you select the table in the Document Management Setting dialog. In this part, we will not use the Document Management setting dialog, therefore we must understand what is happening and what will be missing if we don’t have another option.
Let’s fast forward a few steps - in a later stage of the custom process we will find out, that the regarding option for Document Locations is only available for a few tables and other default or custom tables cannot be selected in the regarding object.
 This step is done automatically by the Document Management settings dialog.
Once we have identified this mssing piece - let’s find out what we must do.
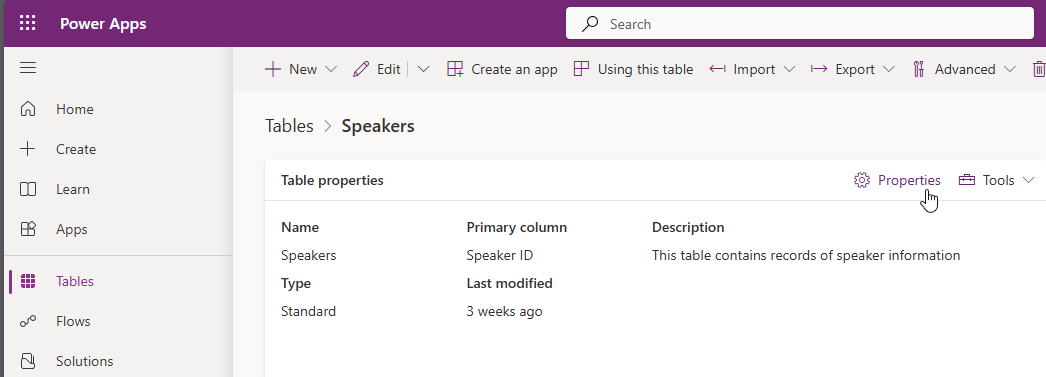
Open the Maker portal, navigate to the table that you want to enable for SharePoint Integration (best within a solution) and open the table properties.
 Click on the Advanced Options and in the second area with options you will find the entry “Setting up SharePoint document Management” that you must activate for every table that should be available for SharePoint.
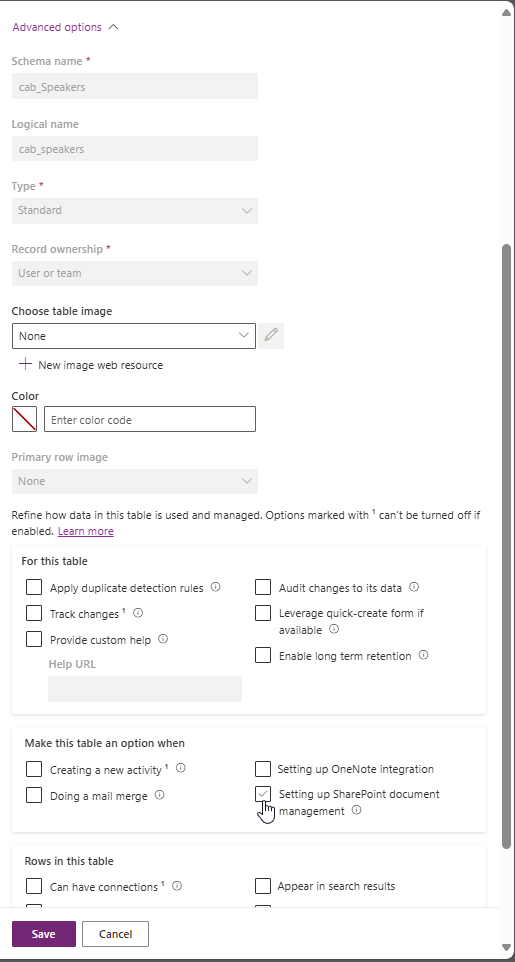 Once activated, don’t forget to save.
Create a Power Automate flow to manage SharePoint folder creation and Document Location setup
Thanks to Power Automate and using the Dataverse and SharePoint Connectors it is quite easy and straight forward to implement a custom SharePoint Integration. At least for the Happy Path when you want to create the SharePoint folder based on a specific trigger. If the use cases get complicated, and you have a lot of changes that affect the SharePoint hierarchy, then you have to find some additional solutions - but even in these cases you can be quite creative with Power Automate that is e.g., triggered by a click of a button or a scheduled flow that will clean up every night.
The happy path may include some manual one-time steps that you need to do in preparation. In addition, with enough SharePoint know how, you can always automate as well this part to create automatically a SharePoint document library base structure with respective document library records in dataverse.
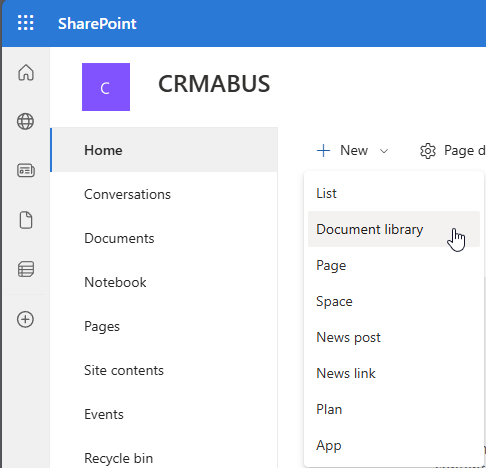
But first, let’s start with the preparation of the basic folder hierarchy that you want to implement. Go to your SharePoint Site - Home area and create a “Document library” for the events - using New - Document Library - Blank template.
 Once the Document Library is created, Open the Advanced Settings in your Model Driven App - Document Management - SharePoint Document Location
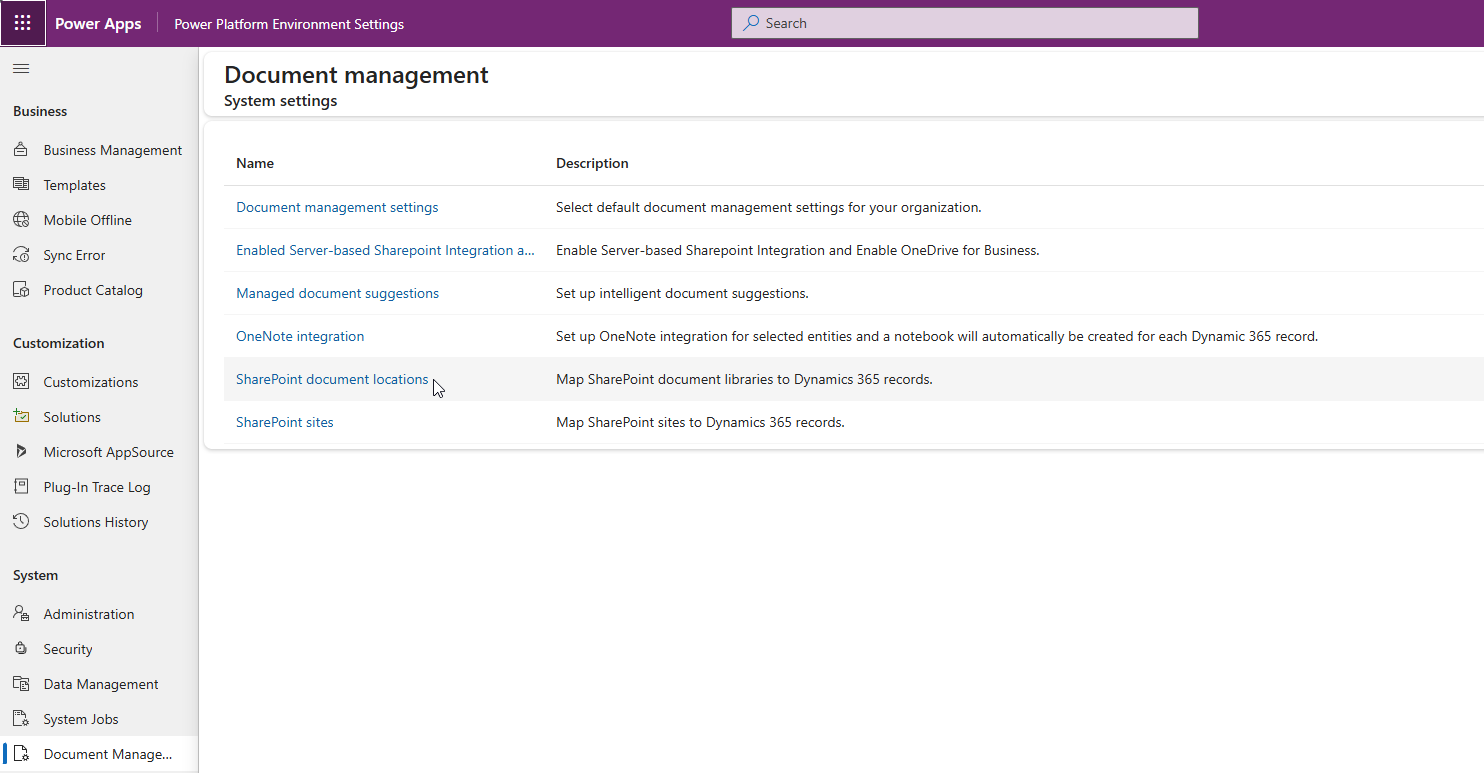 and create a new entry for your base document library.
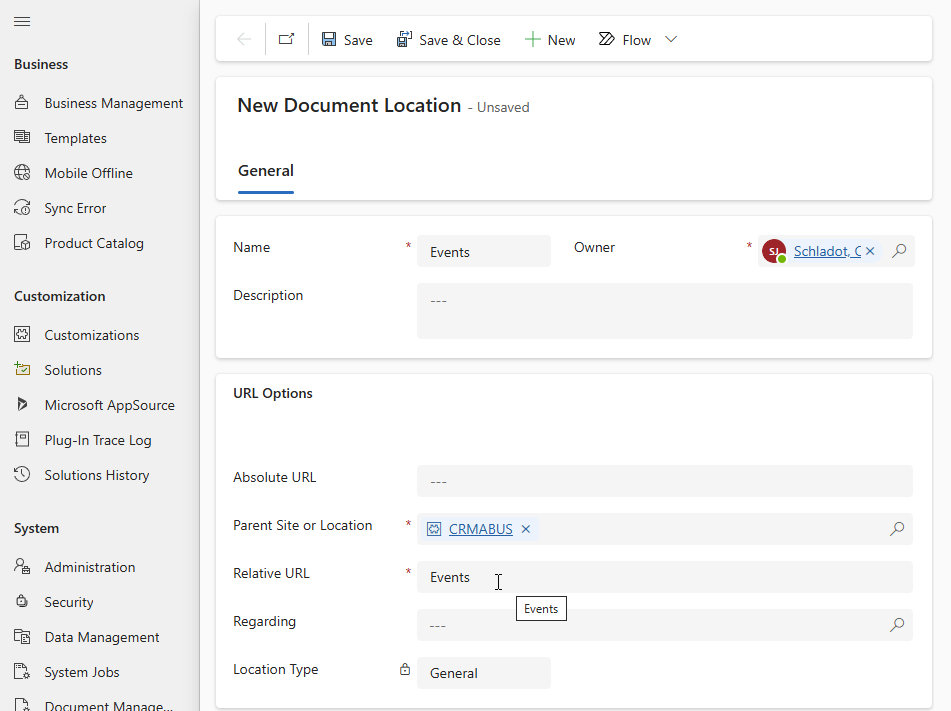
For the record Name I recommend to use the same name as for the SharePoint Document Library. As this is the first level in the hierarchy, select the Parent Site record in Parent Site or Location. If you are not sure, what the Relative URL of your Document Location is, look at the URL when you open the Document Library in SharePoint. You will find the value directly behind the Site URL. In most cases it is the same value that you have entered for the Document Library.
Now, let’s start with the creation steps of the SharePoint folder for a specific record. And don’t forget to rename your flow steps directly, before creating the next step.
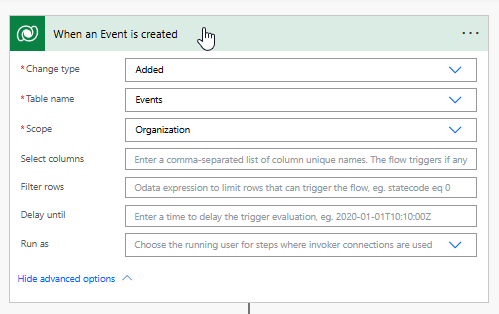
- Create a new automated Cloud Flow, triggered by adding a record in Dataverse.
You could also add a Button to the Command bar and/or add a Create SharePoint folder boolean to the table, if the creation should be a more manual step. You just need to change the trigger then from Added to Modified and define the Filter rows criteria.
As you want to create the SharePoint folder for a specific event record, the trigger will be Dataverse based. Either on create (added) or when you select modified, make sure to define a column that will be the trigger.
In my case, I will go with the creation (added) of a record.
After the flow is triggered in Dataverse, the next step is to create a new SharePoint folder. Luckily, there is already a SharePoint Action that we can use to “Create a new folder”. Select the Action and enter the following values: For the Site Address, use the Site that you have specified in Dataverse. In the following dropdown for List or Library, select the just created Document Library - I will use Events. As Folder Path I will now add an Expression. Instead of using the GUID, I will use a combination of name and Autonumber to have a unique name for the SharePoint folder and by using the autonumber in most cases a more user friendly one.
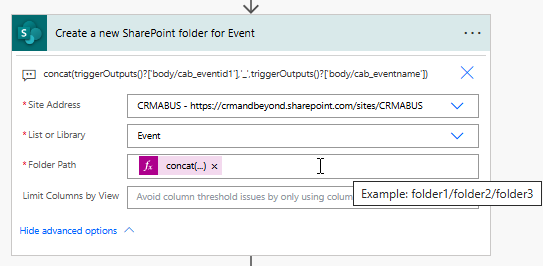 Quicktip: to avoid that the fx in Power Automate cannot be identified easily, just copy the expression and add a note to the action step.
The Expression that I will use is concat(text1,text2,…) as described above to have a unique folder name.
Once I have selected concat from the string functions, the expression is already added to the formula area. Click between the () and change to Dynamic Content. Now you can select the values from previous steps that you want to use for concatenation. I will use Event ID and Event Name. In addition, I would like to separate these values with . Therefore, the expression will look like: concat(Event ID,’’,Event Name). Power Automate will automatically replace Event ID and Event Name for me in the Expression with the respective triggerOutput values.For the happy path, we can just add a final third step, as we know all needed values, or can grab these either from SharePoint or Dataverse. The last step is to create a new Document location record in Dataverse for the SharePoint folder. Select the Dataverse Action to create a new row. As table name select Document Locations. Name the record as you like - I normally use the SharePoint Folder name or “Documents for SharePoint ‘Name’”, where I use the Name value from the previous Sharepoint Action step. Service Type is SharePoint. For parent site or Location we need to go to the Dataverse Document Location record of the Events that we have created before and copy the GUID from the browser bar. If you open the Document Location record that you have created manually in the browser, in the Browser bar your URL will end on something like “etn=sharepointdocumentlocation&id=123456-0123-ef12-123a-123456789”
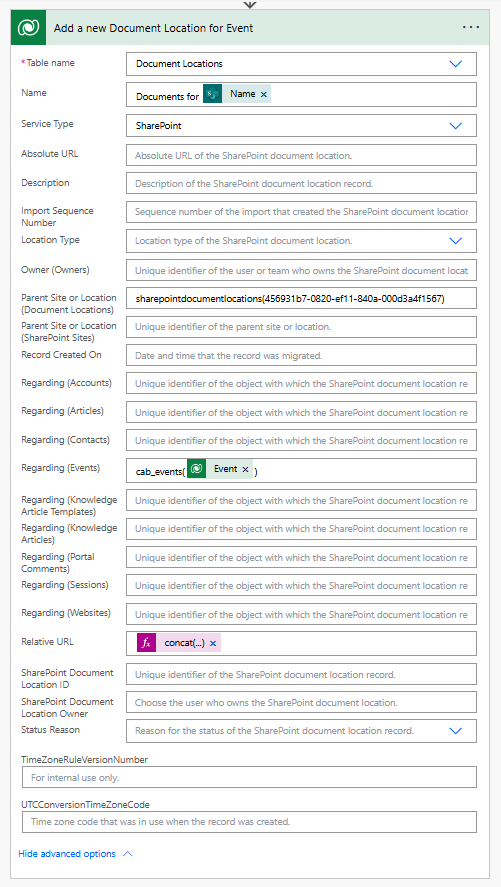
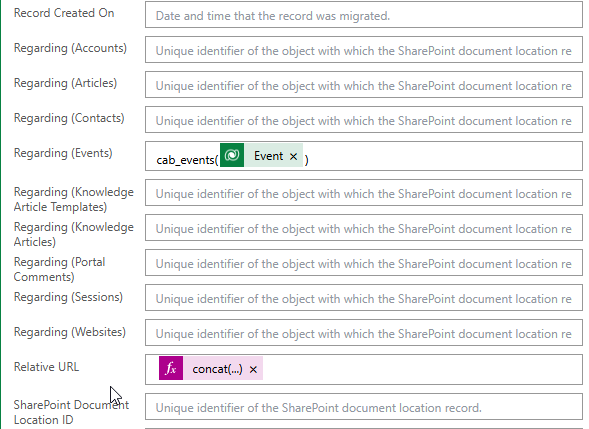
You can also use another Power Automate Action where you list all document locations with a filter for the Name and select the first result, but for this example I will directly use the GUID. Another benefit is, that when you inspect the browser bar, you will already see the table logical name that is needed of this action as well. Be aware, that you must use the plural name of the table in the Power Automate step: Parent Site or Location (Document Locations): sharepointdocumentlocations(GUID id of record) replace GUID id of record with the value of your record (123456-0123-ef12-123a-123456789). When you have activated the SharePoint Integration for your table, you will find the respective Regarding (YourTableName) entry. Start with the plural name of your logical table name. Make sure, that you will use the complete name incl. a prefix if necessary: cab_events(Event) where Event is the Unique Identifier from the trigger. For the relative URL you can reuse the concat Expression that you have used to create the SharePoint folder name.
That’s it. Save and Test your flow. Go to Dataverse and run the triggering event. If everything is set up correctly, the flow will run without problems, and in your SharePoint Document library a new folder is created, and in Dataverse when you open the record and navigate to the Document tab, the SharePoint folder will be shown.
Now, it is up to you to be creative and build your custom hierarchies with SharePoint folders. Think about edge cases - e.g. there are also Copy / Move folder actions available that you can trigger automatically or by click on a button. Or you can grant access to an item or folder in SharePoint.
If you like, reach out to me on LinkedIn.
All parts of this series (22)
- 11. Custom SharePoint Integration with Dataverse
- 14. Setup Document Management Settings
- 17. Enable Default SharePoint Integration in Dynamics 365 CE
About CRM and Beyond
Jörgen Schladot

Solution Architect
Dynamics 365 CE & Power Platform
@ Avanade Deutschland GmbH
Recent Posts
Tags
Archives


 azure
azure
 copilot
 dataverse
 dynamics365