Setting up XRMToolbox
This post is part of the XRMToolbox series.
XRMToolbox is a community tool that is available since 20212 already. The Tool itself has been developed by MVP Tanguy TOUZARD, who has also created a lot of the available tools within the Toolbox (MSCRM).
 And that is the really valuable and beautiful part of the XRMToolbox. Over the years, the toolbox has really evolved to a commmunity tool, where lots of other developers contribute by adding new tools and functionalities. Sometimes, you will have multiple tools for the same task, but with a slightly different approach, and you can seelct out of all the available tools, which one is the best for you.
but now, let’s get started.
By clikcing on the following link, a new browser tab will open with the homepage of the XRMToolbox:
https://www.xrmtoolbox.com/
On the homepage, you will also find a list of all available tools - which are at the moment already more than 350 (and the number is still growing)
https://www.xrmtoolbox.com/plugins/
in the provided tools list you can filter for different categories or search for tool name or othor. Once you start typing, the list is already filtered. Besides the name and the link to the tool, you get additional details about the status, number of downloads and ratings from the community.
And the list of contributors contains a lot of MVPs, like Jonas Rapp, Scott Durow, Daryl LaBar, Carl Cookson, Clement Olivier, etc. Sometimes not only with one but several tools.
Directly on the Homepage you will find a button to Download the latest version - once you click on the button, the XRMToolbox.zip file will be downloaded.
- Extract the XRMToolbox zipfile to the folder, where you want to store the program.
- Open the XRMToolBox using XRMToolBox.exe
- Once loaded, the XRMToolbox is empty. Use Configuration –> Tool Library in the main menu.

- A new tab “Tool Library” opens and you can filter, which Tools you want to see e.g., Show tools not yet installed, tools installed, tools with updates, etc. I normally prefer to select Tools not yet installed and Tools with updates. In the main are, now the list of tools appears, and you can select the ones that you would like to install.
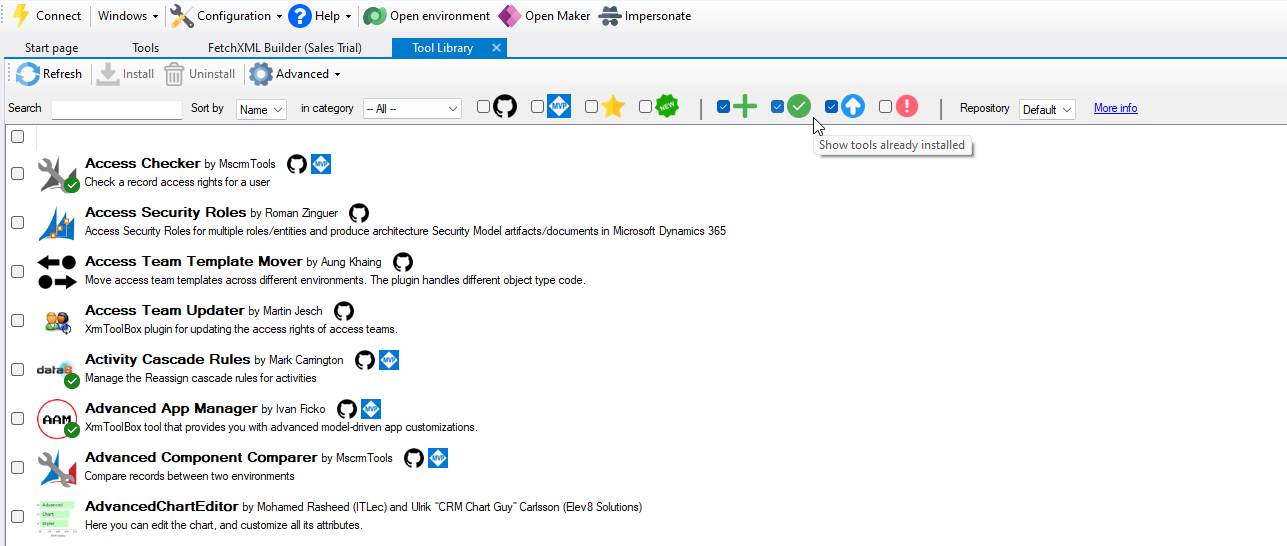
- Have a look at the upcoming XRMToolbox series, if you need some suggestions for tools, or have a look at the website tools list and look for the most downloads and highest ratings. With these tools you can definitely start to play around e.g., FetchXMLBuilder.
- When you have selected the tools that you want to install, click on the green install button

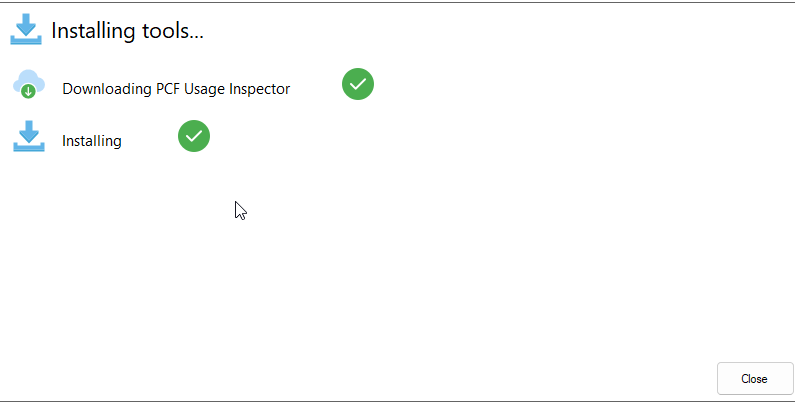
- A new window will pop-up, showing you the installation progress. The more tools you install, the longer the process will take. Some of the tools may require a restart of the XRMToolbox, while others will just work directly.
Create a new Connection
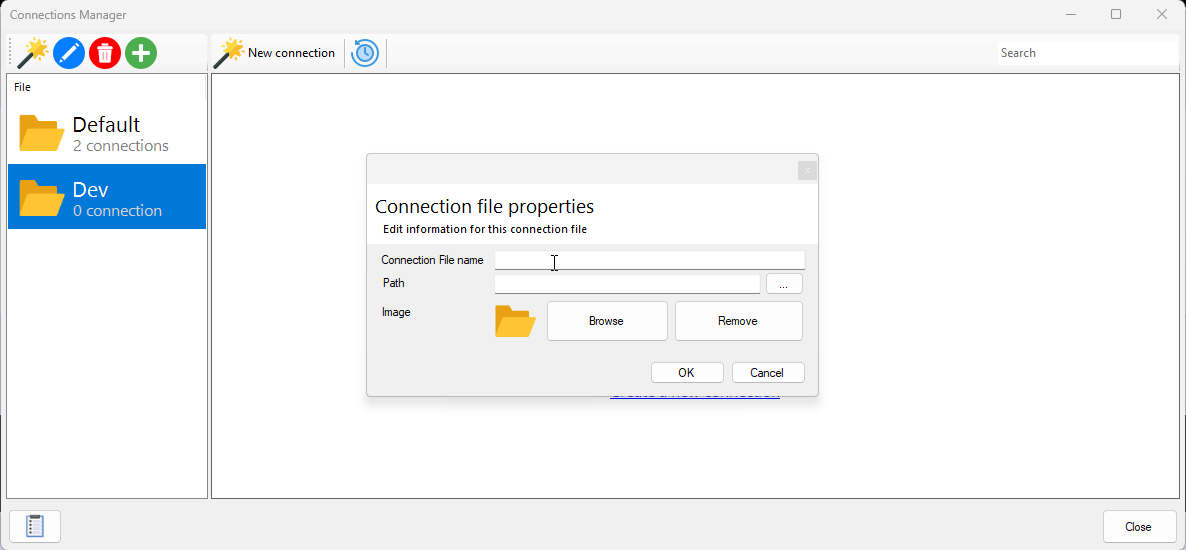
- Select Configuration –> Manage Connections in the main menu of XRMToolbox. The Connections Manager will open. The Magic Wand Icon will allow you to create a new connection file. Provide a name and the path to the folder, where the file should be created. Once saved, the connection file will be shown as folder icon on the left of the Connection Manager window and you can store several different connections within a connection file. This will help you to structure your different connections, e.g. either by Tenant or by purpose (Dev, Test, etc.)
- Select the Connection file and click on New Connection. A new windows will open, providing different options to sign in to your environments. I will use Microsoft Login Control for this example. First a new window will open and you have to select again Open Microsoft Login Control on the bottom right.

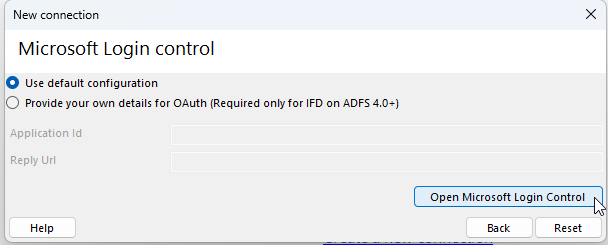
- In the new window, select Office 365 and select Display list of available organizations, to see the list of all available environments in your tenant.
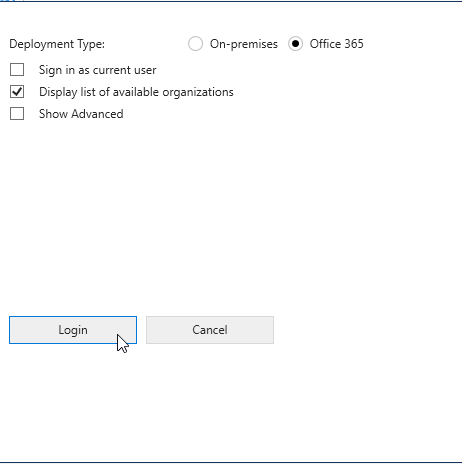
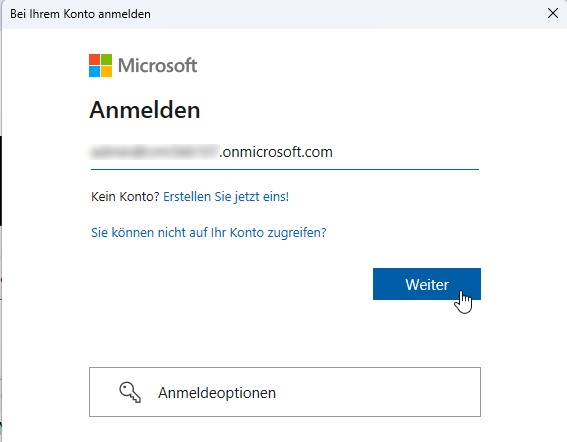
- Then you have to sign in ywith your username, password and if configured MFA.
- Once connected, the next window wshows you a list of all environments and you have to select one, which will be ised for this specific connection.
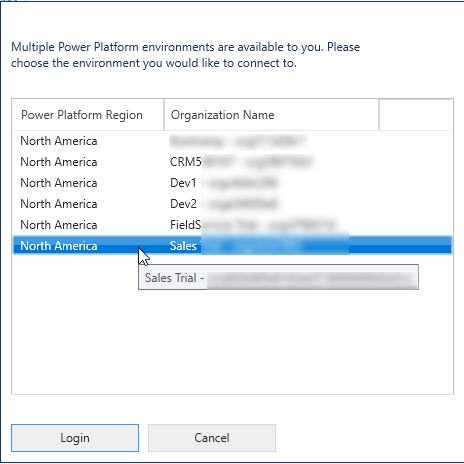
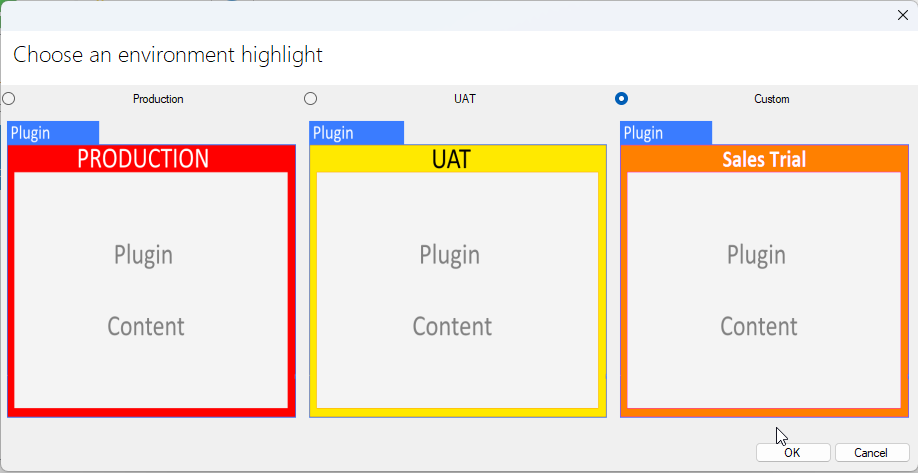
- Confirm your selection by clicking on Login. The next screen allows you to configure some attributes for this connection which will help you to visually identify the connected environment, when you are working with the plugins in the toolbox. You can either use predefined values for Production and UAT or specify your own values by selecting custom.
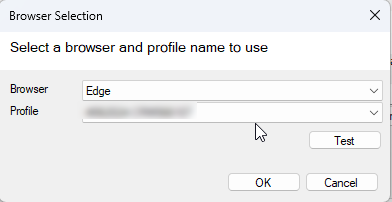
 As one last step you can also define a specific browser and profile for this specific connection. This is really great, as I am always use different browser profiles at least for different tenants. By configuring this step, the plugins will open directly the correct browser profile and mixing up cookies or having strange behavior due to cache problems can be avoided more easily.
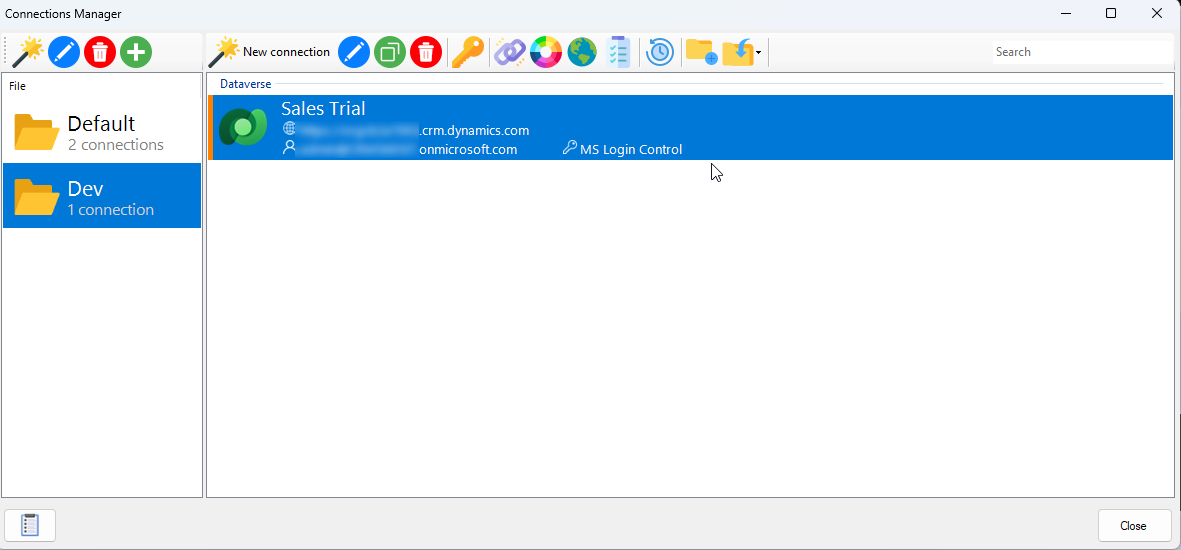
 When you have finished the configuration, the connection now appears within you connection file. If you’d like, you can configure different connection for other environments or tenants.
 Please remember, once you have connected to an environment, all plugins will use the connected environment. You can always see the status of you connection at the bottom left of your XRMToolbox window.
 - Once you now open a tool, the tool window itself will show the name and color that you have defined for the active connection

All parts of this series (9)
- 1. Ribbon Workbench a tool within XRMToolbox
- 2. Attribute Bulk Updater a tool within XRMToolbox
- 3. Activity Cascade Rules a tool within XRMToolbox
- 4. Flow Visio Builder tool within XRMToolbox
- 5. Easy Translator a tool within XRMToolbox
- 6. Metadata Document Generator a tool within XRMToolbox
- 7. Polymorphic Lookup Creator a tool within XRMToolbox
- 8. FetchXMLBuilder in XRMToolbox
- 9. Setting up XRMToolbox
About CRM and Beyond
Jörgen Schladot

Solution Architect
Dynamics 365 CE & Power Platform
@ Avanade Deutschland GmbH
Recent Posts
Tags
Archives


 azure
azure
 copilot
 dataverse
 dynamics365